
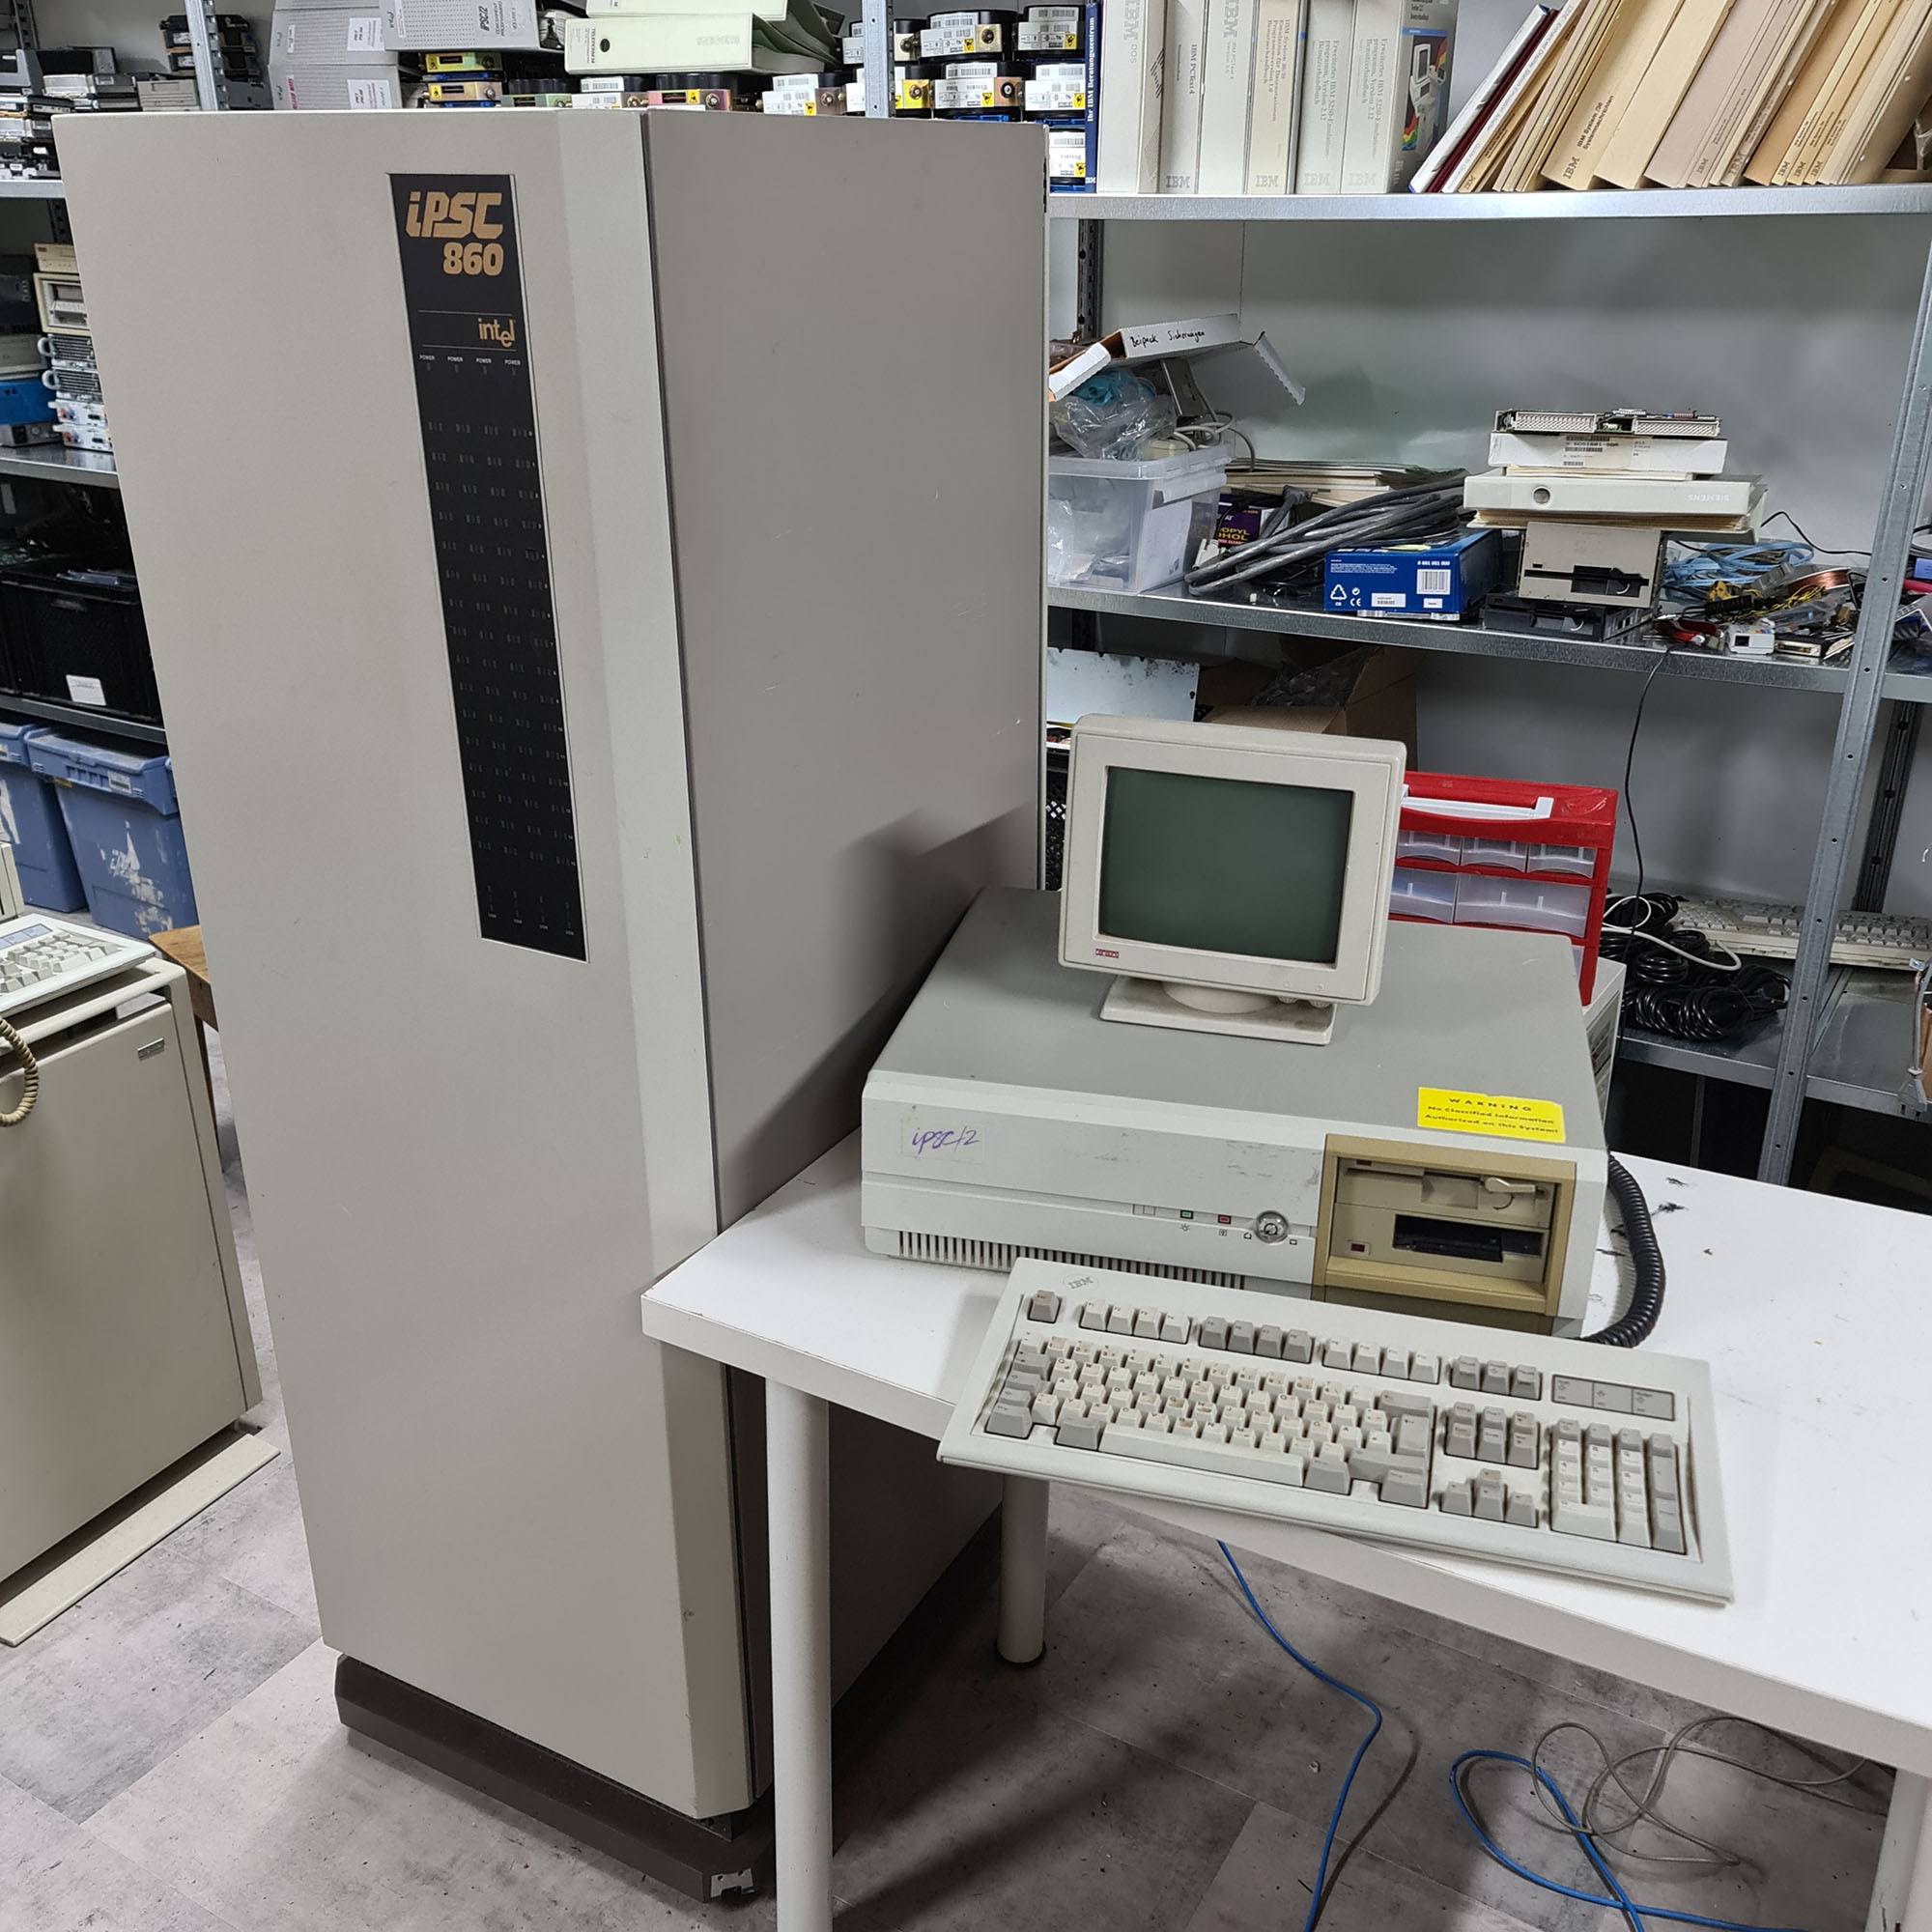
After we received an appropriate Intel SYP30 front-end (SRM), we could start thinking about getting our Intel iPSC/860 running again. The SYP-301 came with documentation and software for iPSC/2 and iPSC/860 systems, and an iPSC/2 cardcage with 8 node boards from an iPSC/2, a node board from an iPSC/860, an I/O board with SCSI controller, and a USM board.
After we received an appropriate Intel SYP301front-end (Getting an SRM for the Intel iPSC/860), we could start thinking about getting our Intel iPSC/860 running again. The SYP-301 came with documentation and software for iPSC/2 and iPSC/860 systems, and an iPSC/2 cardcage with 8 node boards from an iPSC/2, a node board from an iPSC/860, an I/O board with SCSI controller, and a USM board.
First, we had to get the software up and running on the SRM. We wrote about getting the SRM to boot System V UNIX earlier (SRM for the iPSC/860 boots!), but we hadn’t installed the iPSC specific software yet, and there were some issues with the recovered System V installation. Some files were corrupted on the disk, and as a result some UNIX commands were misbehaving (e.g. any attempt to use the vi editor resulted in a core dump, leaving us with just ed (which is fine, but vi is much more convenient).
with a little TLC, using new tension belts and Tyvek over the tape bollards, we managed to make images of almost all of the installation tapes. We used the opportunity to write an article about our process for QIC Tape Data Recovery, so you can find some of those details here. One tape was giving us difficulty though, and that was the Intel System V R3.2 V2.1 installation tape, which we need for the all important first step of installing a clean copy of the OS. That tape had a bad spot in the middle of the tape, a spot that threw read errors on every pass across it.
To recover that installation tape, we read all the bits that we could read, leaving gaps of missing data. Analysis learned that the installation tape consisted of a number of cpio file archives. These archives contained the files to install, as well as installation scripts. As part of the installation scripts, a check was done to verify that all files had been extracted from the archive. This gave us a list of which files were supposed to be present in each of the archives. Analyzing each of the archives that had some data blocks missing, we could determine which files were fully there, which files were partially there, and which were completely missing. We then wrote a small utility to extract all the files from the disk image we made of the existing installation (fortunately, System V filesystems are dead easy to figure out), and using a hex editor, we put the missing files into the archives, creating cpio headers for each of them. Confirmation that this was done correctly was gained when the total length of the archive after fixing them was a multiple of the 512-byte tape block size.
The other issue was that the installation diskette threw errors about being unable to write temporary files when trying to start an installation. We found that this could be fixed by running fsck over the diskette image.
So, with fixed installation diskette and tape images (both available in the downloads section), we managed to do a fresh installation of Intel System V UNIX on the pcem emulator.
After installing the base Operating System, we followed all the steps in the Intel iPSC/2 and iPSC/860 Release 3.3.1 Software Product Release Notes to install all the R3.3.1 software and patches, still on pcem. After writing the resulting disk image to an IDE disk again (since replaced with an industrial-grade CF card), we put the disk into the SYP-301 and booted it. The iPSC interface card driver detected the DCM card, and the network driver recognized the Intel pc586 NIC. After configuring TCP/IP, we could also access the SRM over the network.
The next step was to connect the SRM to the Hypercube. The cable that came with out iSPC/860 was badly damaged. One connector had partially broken off, and the cable was nearly cut in half near the middle. After cutting out the damaged bit, we figured out the wiring, then put a new connector on the half of the cable with the other good connector. There are 7 shielded twisted pairs in the cable, 4 pairs for the high-speed cube interconnect, and 3 pairs for a slower synchronous serial connection for diagnostics.
After connecting the cube to the SRM with the fixed cable, we started following the diagnostic procedures outlined for verifying a system. First, it turned out that one of the 16 i860 node boards wasn’t booting at all. I swapped it with the i860 node board I received with the SRM, but that one timed out during initialization. Swapping memory and DCM modules between these two boards did not result in a working node, so we decided to continue running diagnostics with 15 nodes. it turned out that 2 more i860 nodes were unreliable and didn’t pass diagnostics.
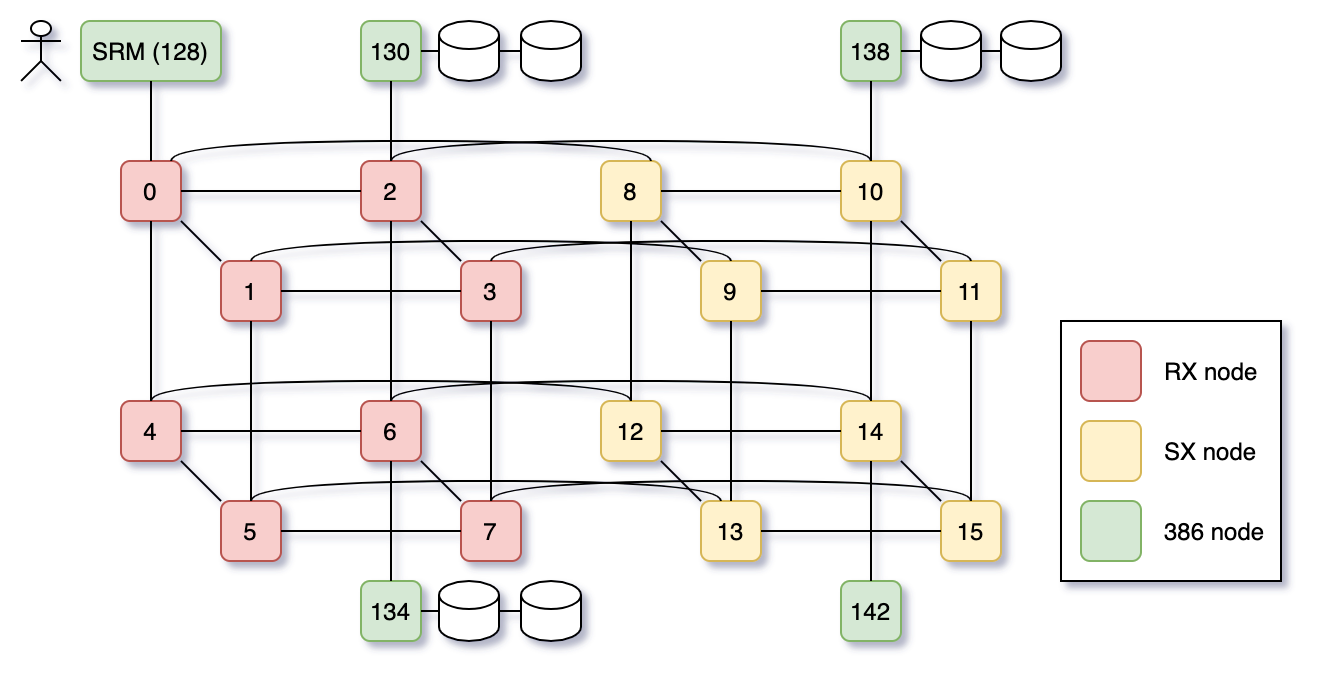
The way the iPSC works, is that you allocate a hypercube for your calculations, so if you have between 8 and 15 nodes, you can run your calculations on a maximum of 8 nodes. The architecture does allow mixed-architecture hypercubes, though, so what we ended up doing is put 8 working i860 nodes into the chassis as nodes 0-7, and replace nodes 8-15 with the iPSC/2 SX nodes (Intel 386 + Weitek numeric coprocessor) that we received with the SRM. Fortunately, all of these node boards are functioning, so with that combination of boards, we could pass initial diagnostics with the full 16 nodes. These initial diagnostics (“Node Confidence Tests”) start from the assumption that nothing works, and start testing all low-level functionality one bit at a time. After passing the NCT, you can run the SAT (System Acceptance Test); this is a higher-level diagnostic that mimics application behavior to stress-test the system as a whole. Since the SAT tests are single-architecture only, we ran them twice, once for an 8-node i860 hypercube, and once for an 8-node SX hypercube.
System V.3.2 UNIX (ipsc860)


login: camiel
Password:
UNIX System V/386 Release 3.2
ipsc860
Copyright (C) 1984, 1986, 1987, 1988 AT&T
Copyright (C) 1987, 1988 Microsoft Corp.
All Rights Reserved
Login last used: Fri Jan 15 23:31:01 1988

/         :     Disk space:  97.23 MB of 110.74 MB available (87.80%).
/usr      :     Disk space: 221.52 MB of 332.22 MB available (66.68%).

Total Disk Space: 318.75 MB of 442.96 MB available (71.96%).

TERM=vt100
$
$ su
Password:
#
# bootcube
 1.  Reset driver
 2.  Scan cardcages
 3.  Reset nodes
 4.  Scan nodes
 5.  Download 386 boot loader: /usr/ipsc/lib/bootld
 6.  Download 860 boot loader: /usr/i860/ipsc/lib/bootld
 7.  Start boot loader
 8.  Load SRM Direct Connect Module
Load SRM DCM with /usr/ipsc/lib/hbits.g
 9.  Query nodes
10.  Load 386 node Direct Connect Modules
Load 1 node DCM's with /usr/ipsc/lib/386nbits.d
Load 4 node DCM's with /usr/ipsc/lib/386nbits.e
Load 7 node DCM's with /usr/ipsc/lib/386nbits.f
11.  Load 860 node Direct Connect Modules
Load 8 node DCM's with /usr/ipsc/lib/860nbits.f
12.  Initialize node Direct Connect Modules
13.  Test nodes
14.  Reset Direct Connect Modules
15.  Check configuration file
16.  Execute startup run file: /usr/ipsc/lib/rc1  -Q /usr/ipsc/conf/cubeconf
17.  Send load command to nodes
18.  Get boot partition
19.  Download /usr/ipsc/lib/nx.b
20.  Download /usr/i860/ipsc/lib/nx.b
21.  Release boot partition
22.  Execute startup run file: /usr/ipsc/lib/rc2   -Q /usr/ipsc/conf/cubeconf
No drives available
Non-CFS initialization complete
#
# getcube -t rx
getcube successful: cube type 8m16rxn0 allocated
#
# sat

iSAT - iPSC System Acceptance Test, v1.0
Probing hardware configuration ...
        Detected RX nodes with:
    no extras

Reading test configuration file /usr/ipsc/diag/satbin/satconf.rx ...
        5 tests listed in configuration file.

Main Menu
   0. Return to UNIX
   1. Show Help
   2. Manage Test Configuration
   3. Manage Log File
   4. Enter Shell
   5. Run Tests

Enter Selection [5] -> 5

System Acceptance Tests
   0. Return to Main Menu
   1. Help
   2. Msgsize Test
   3. CFT-ncft Test (disabled)
   4. Async Test
   5. Rand-ih Test
   6. 3d-fftrx Test
   7. Run All Tests (approx. 110 minutes)

Enter Selection [7] -> 7

Running System Acceptance Tests

How many cycles? (0 for continuous; q for menu) [1] ->
Starting logging for this run...Done

 -@- 01/16/88 03:03:08  Starting SAT cycle 1 of 1
 -@- 01/16/88 03:03:08  Executing Msgsize
1/16/88 03:03:09 NODE: 8 PID: 64 : Start MSGSIZE.H test.
NODE: 8 PID: 64 : Message size = 33000, cycles = 100
1/16/88 03:03:13 NODE: 8 PID: 64 : On cycle 1, msg size 0
 -@- msgsize: PASSED -@-
 -@- 01/16/88 03:33:11  Test done, 0 errors.
 -@- 01/16/88 03:33:12  Executing Async
ASYNC: Asynchronous Message Passing test
ASYNC: using async.rx with 100000 byte messages.

 -@- ASYNC async.rx: PASSED -@-
 -@- 01/16/88 04:13:15  Test done, 0 errors.
 -@- 01/16/88 04:13:16  Executing Rand-ih
Message 0, seed 00000001, Sat Jan 16 04:13:18 1988
RAND: Random Message Exchange test, using ihrxnode.rx
 -@- RAND ihrxnode.rx: PASSED -@-
 -@- 01/16/88 04:43:19  Test done, 0 errors.
 -@- 01/16/88 04:43:20  Executing 3d-fftrx
 Elements =      2097152 MFLOPS =    7.685658     Total time =   28.64900
 Elements =       262144 MFLOPS =    6.376055     Total time =   3.700000
 Elements =      1048576 MFLOPS =    7.224106     Total time =   14.51400
 Elements =       524288 MFLOPS =    6.776987     Total time =   7.349000
 Elements =       524288 MFLOPS =    6.797335     Total time =   7.327000
 Elements =      2097152 MFLOPS =    7.612848     Total time =   28.92300
 Elements =      2097152 MFLOPS =    7.465212     Total time =   29.49500
 Elements =      2097152 MFLOPS =    7.571488     Total time =   29.08100
 Elements =      2097152 MFLOPS =    7.567844     Total time =   29.09500
 Elements =      1048576 MFLOPS =    6.703150     Total time =   15.64200
 Elements =      1048576 MFLOPS =    6.865550     Total time =   15.27200
 Elements =      1048576 MFLOPS =    6.920837     Total time =   15.15000
 Elements =       262144 MFLOPS =    5.570579     Total time =   4.235000
 Elements =       262144 MFLOPS =    5.745592     Total time =   4.106000
 Elements =       262144 MFLOPS =    5.770891     Total time =   4.088000
          Name        Hardware  MaxTime RunTime Errors Comment
   1. Msgsize             HOST     30      30      0   host-node comm
   2. CFT-ncft             CFS disabled     0      0   node-ionode general
   3. Async               NODE     40      40      0   node-to-node comm
   4. Rand-ih             NODE     30      30      0   random isends, hrecvs
   5. 3d-fftrx         860NODE     10      10      0   numerics and comm
        Totals:                   110     110      0

 -@-    SAT run finished, 0 errors seen in this run.
#
We also compiled some of the code examples and ran them on the system.
One thing that isn’t working yet is the concurrent filesystem. The hard disks in the iPSC/860 haven’t survived, and CFS doesn’t like the SCSI2SD cards that I tried, even after making some changes to the SCS2SD card firmware to mimic the correct disk geometry. Work on getting CFS working remains to be done.
In the current setup, there are a total of 21 processors. 8 i860 and 8 i386 (+i387 + Weitek) processors on the node boards, 1 i386 (+i387) processor in the SRM, 3 i386 (+i387) processors on the SCSI I/O nodes, and one i386 (+i387) processor on a “service” I/O node. The I/O nodes aren’t part of the hypercube, but each of them is linked to one of the Hypercube nodes, using the same interconnect used between hypercube nodes. The SCSI I/O nodes each have a SCSI bus for the CFS (Concurrent File System), the “service” I/O node can be used to run UNIX commands on (e.g. to backup the CFS), so you don’t have to take compute resources away from the hypercube to do so.