

*** Updated 16-MAR-2017 *** I’ve started working on the Convexes; the first order of business on these machines (after a thorough visual inspection for things like loose wires, bent pins or bulging capacitors) is checking out the power supplies.
*** Updated 16-MAR-2017 ***
I’ve started working on the Convexes; the first order of business on these machines (after a thorough visual inspection for things like loose wires, bent pins or bulging capacitors) is checking out the power supplies. In order to do so, I’ve removed all boards from both the main cardcage and the Multibus cardcage, and unplugged the power connectors from the SPU tapedrive (and SPU hard disk on the C1 XP). As an artificial load I put a 5 ohm power resistor across the main 5V output. After turning the power supplies on, I check the voltages with a multimeter, and I check for excessive ripple with an oscilloscope.
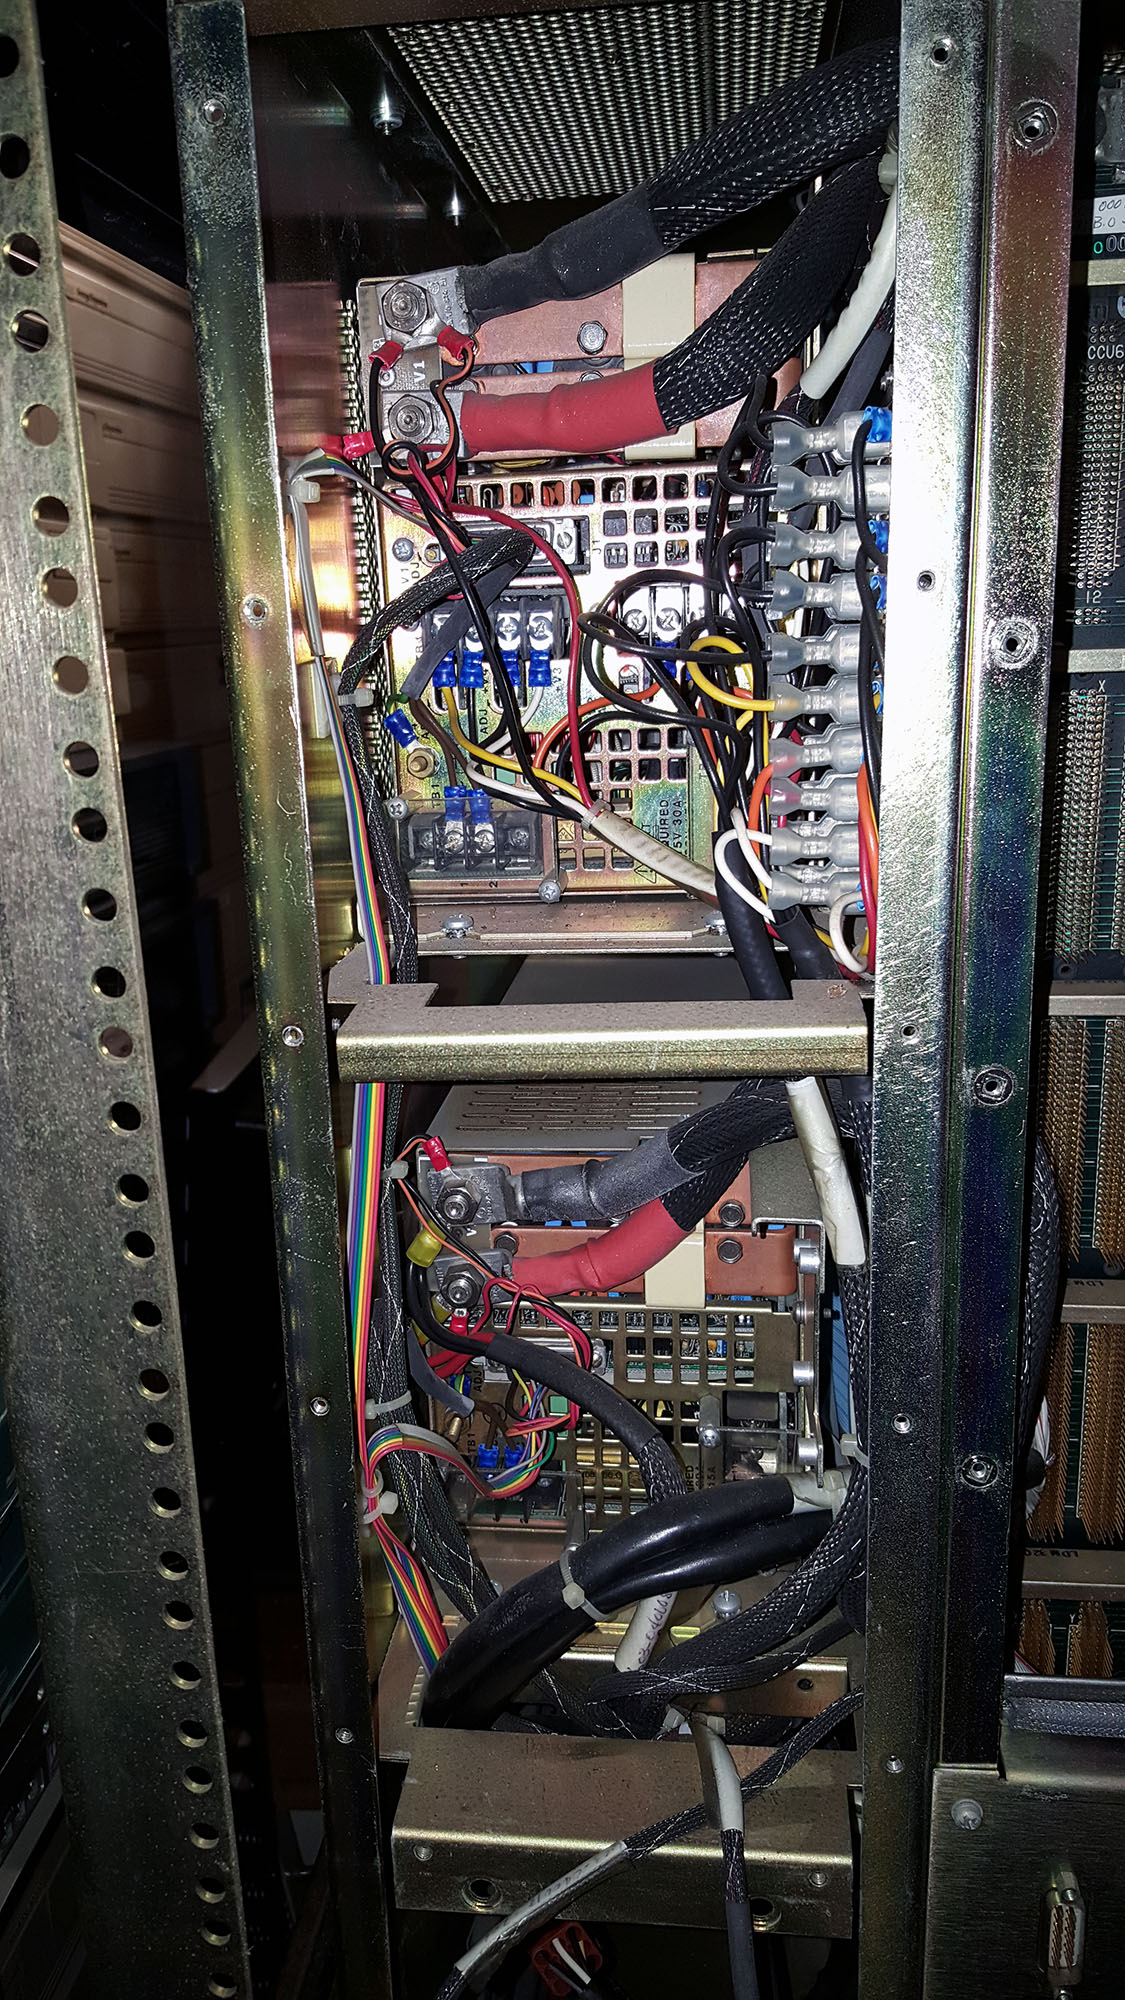
I started with the Convex C1 XL. The XL uses two LH Research Mighty Mite power supplies, the top one delivers +5V, -5V, +12V and -12V, and the bottom one delivers +5V. The top power supply turned out to be just fine (+5V was a bit high, but could be trimmed down), but the bottom one put out 9 volts on its +5V line, with a lot of noise, so this one definitely needs some repairs.
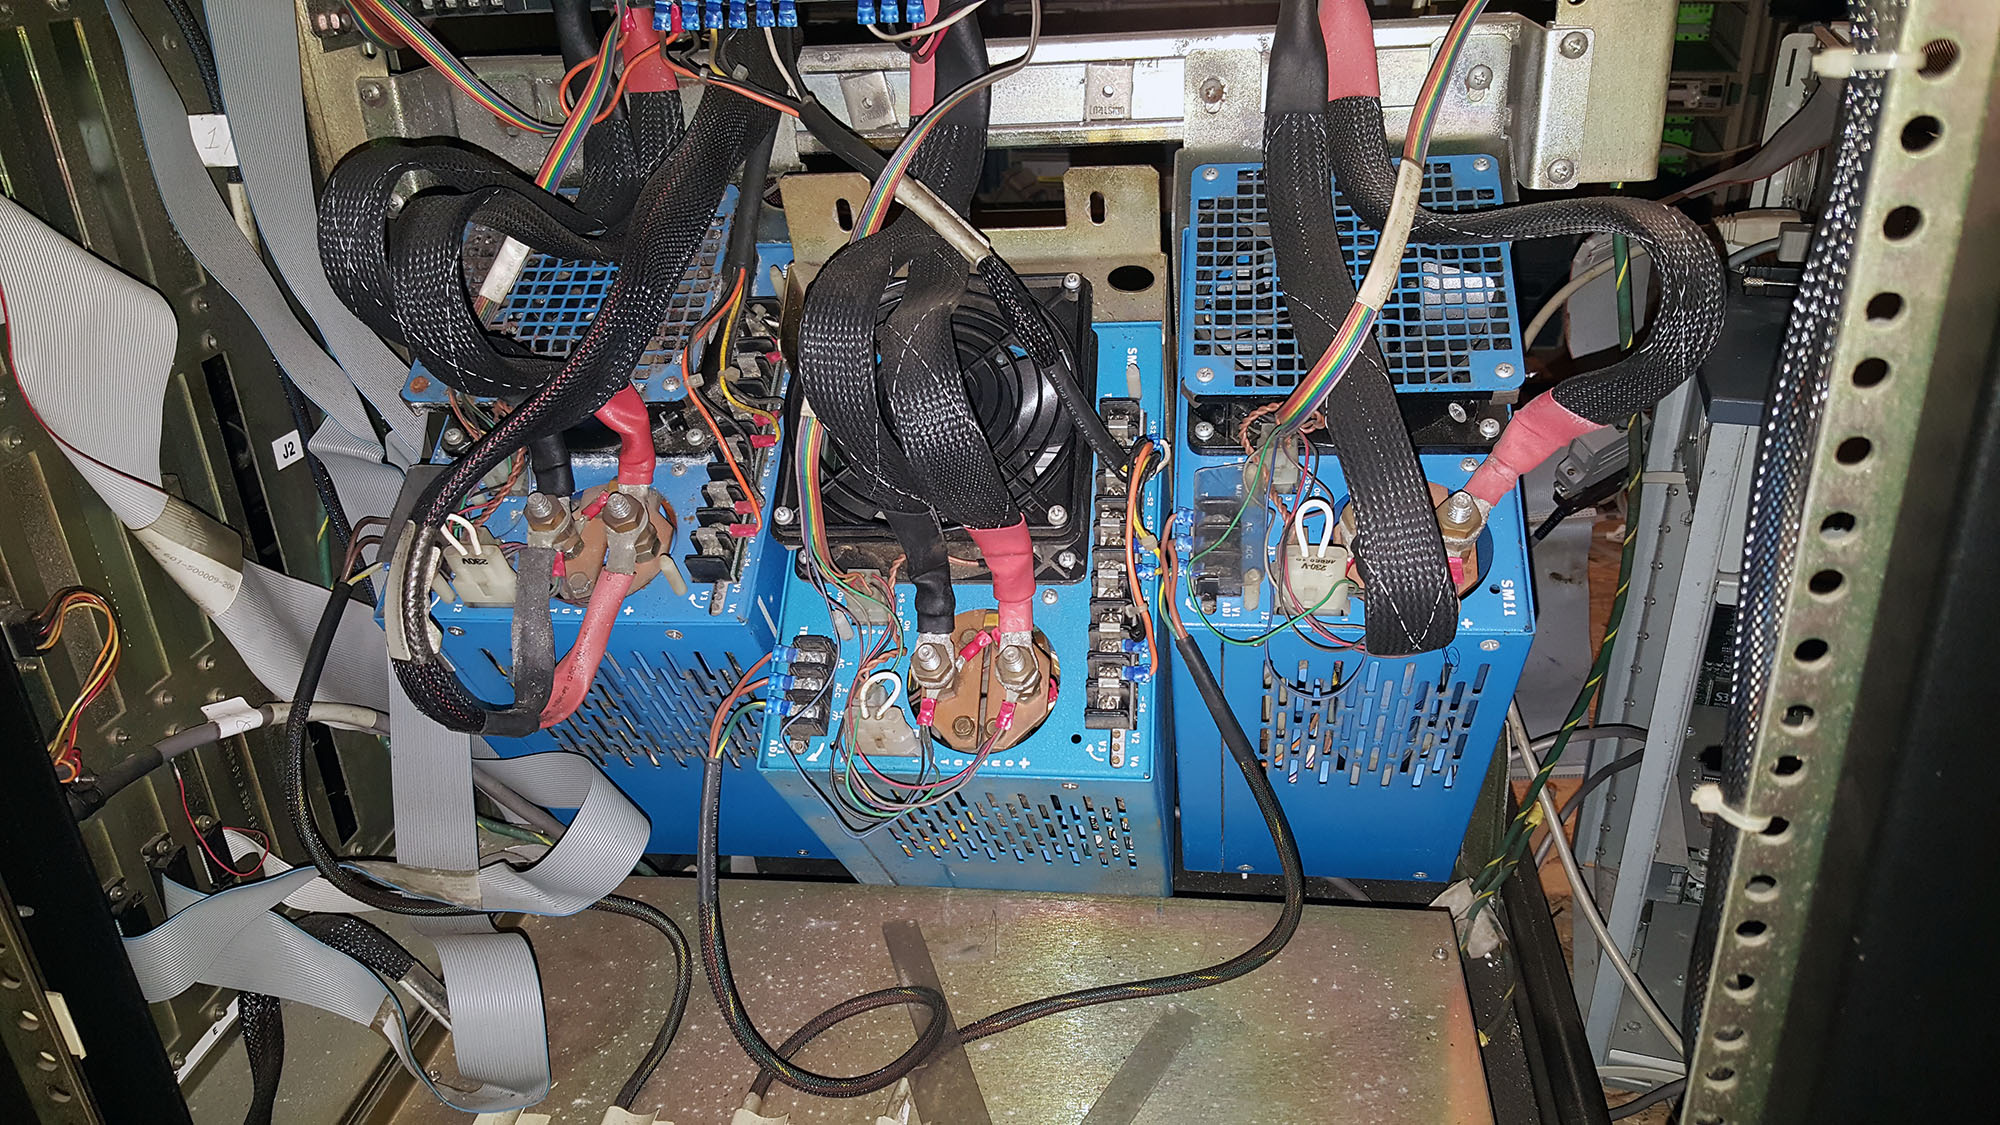
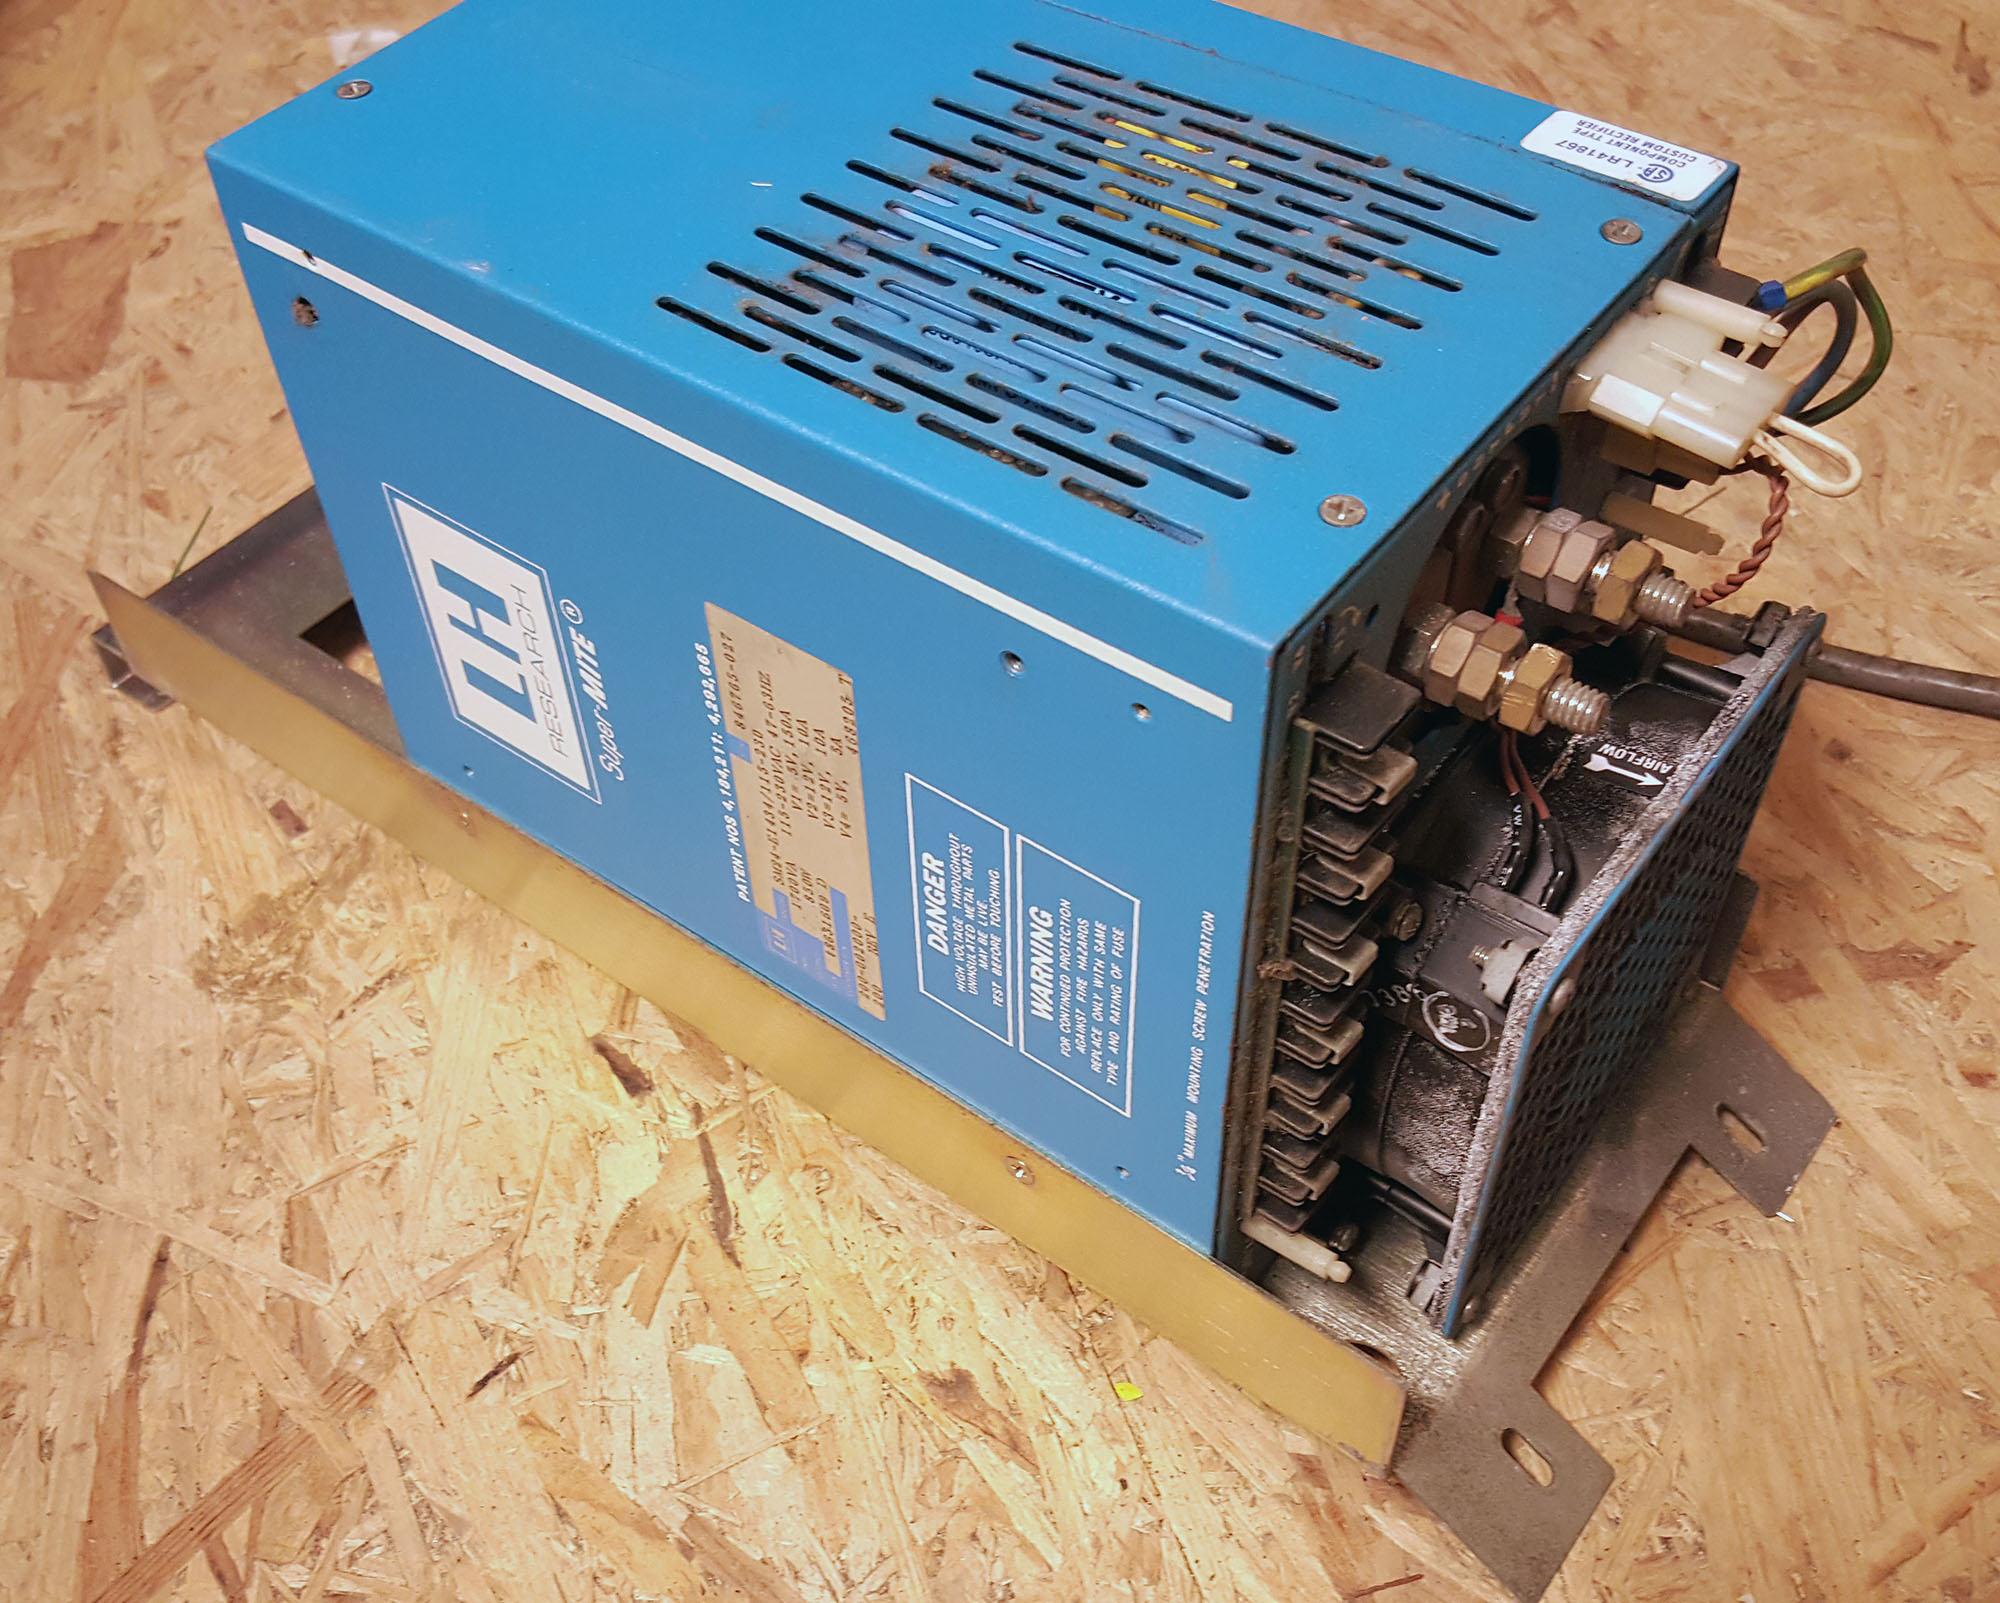
The Convex C1 XP has a beefier power system, with three LH Research Super Mite power supplies, two SM24s delivering all four voltages, and one SM11 delivering only +5V. The SM11 and the leftmost SM24 turned out to be just fine, but the SM24 in the middle was dead. No output at all. This could be a blown fuse of course, but I’ll need to open it up to find out.
Fortunately, as part of the shipment I received a spare SM24 power supply; it has obviously been used, but when I tested it it turned out to be just fine. So, for now, I haven’t performed any repairs yet, just replaced the faulty SM24 with the spare one. 4 out of 6 power supplies are absolutely fine after 25 years of disuse!
So, I now have a C1 XP with a power subsystem thats completely within specification. The SMB board (sort of a cabinet power controller) shows no errors, other than the “SPU ERROR” LED.
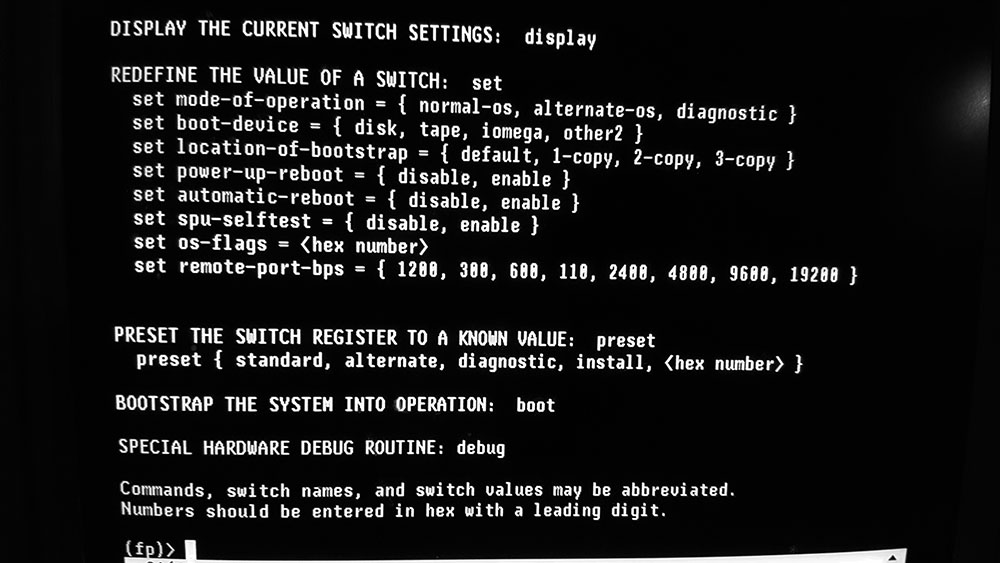
The latter is completely normal, since there’s no SPU (Service Processor Unit) installed in the system yet. So after another verification and visual inspection, I crossed my fingers, and put the SPU into its slot in the backplane. I attached a serial terminal to the console port, and applied power to the system. After a very short initialization, the green OK led on the SPU card turns on, the top LED starts blinking the normal 1Hz heartbeat, and the following output appears on the terminal:
123456789ABC

Convex-1 Front Panel / Module Rev: 1.20, Version: 1 Class: 0 / CPU SN 116
mode-of-operation = diagnostic          boot-device = disk
location-of-bootstrap = default         power-up-reboot = enable
automatic-reboot = enable               spu-selftest = enable
os-flags = 0                            remote-port-bps = 1200
(fp)>
The (fp)> prompt accepts commands (HELP is a good place to start), but of course BOOT fails, because I still haven’t got the hard disk in the system.
16-MAR-2017
So, the SPU disk is 17 MB in size. Unfortunately, 2656 sectors (or about 8% of the disk!) was returned with an I/O error (mostly error code 0x11, unrecoverable read error). You'd think that unrecoverable read error means the data can't be recovered, but when I tried reading just the failed sectors a second time, about two-thirds of them read just fine, with no error returned. Encouraged by this, I read the sectors that had failed twice a third time, and about half of those read fine. I repeated this something like 20 times (automated it, of course), and in the end I'm down to just 43 sectors I can't read reliably. Fortunately, these are all way at the end of the disk, beyond the last block that's actually used by the filesystem, so it should be fine.
I wrote a program to process all the hex dump files to construct a binary disk image, and wrote that image to a regular SCSI disk; I wanted something fairly new, so it would last a while, so I wrote the 17MB image to a 36GB Fujitsu Wide Ultra 3 SCSI disk, with a converter to 50pin scsi attached. The SPU didn't like that disk, it never saw the drive as ready, and I figured this was probably because the Adaptec converter that was used originally used the much older SCSI-1 protocol, which differs in some subtle but nasty ways from SCSI-2 and later protocols.
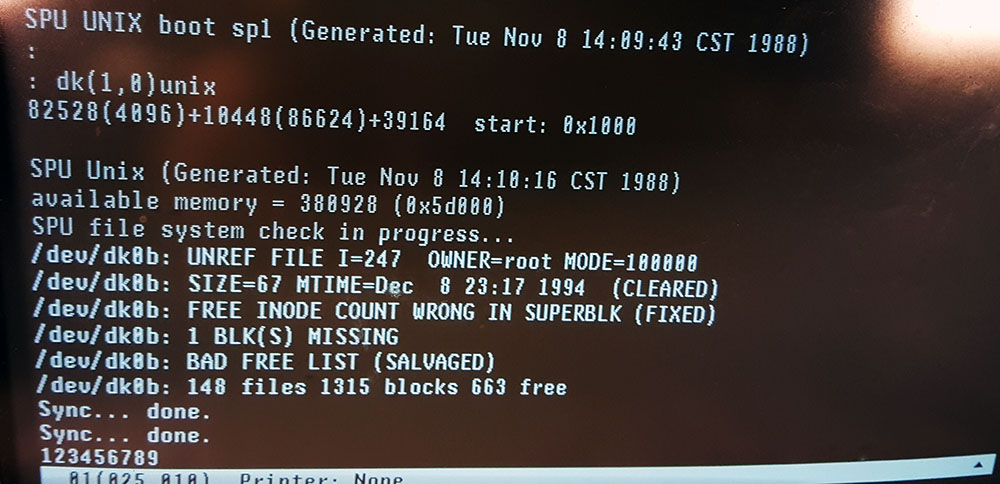
I then took an older disk, a 1GB DEC RZ26B-E. Even though those are old, I've come to know them as pretty reliable, and, most importantly, they have a jumper setting that lets them operate in SCSI-1 mode. I wrote the image to that disk in SCSI-2 mode, switched the drive to SCSI-1 mode, and put it in the Convex, and that works. The SPU now boots from the new drive without problem:
123456789ABC

Convex-1 Front Panel / Module Rev: 1.20, Version: 1 Class: 0 / CPU SN 116
mode-of-operation = diagnostic          boot-device = disk
location-of-bootstrap = 1-copy          power-up-reboot = enable
automatic-reboot = enable               spu-selftest = enable
os-flags = 0                            remote-port-bps = 1200
(fp)>boot

Waiting for disk ready.
SPU UNIX boot sp1 (Generated: Tue Nov 8 14:10:16 CST 1988)
available memory = 380928 (0x5d000)
SPU file system check in progress...
/dev/dk0b: 148 files 1315 blocks 663 free
/dev/dk0d: 512 files 12008 blocks 940 free
SPU file system verified
Mounted /mnt on /dev/dk0d
SPU Unix booted Aug 30 19:26 1970 after power up.  Freq: 50 Hz.

                                  CPU         115

********************************************************************************

        SPU UNIX                         V5.1                    INSTALLED
        CONVEX UNIX                      V7.1                    INSTALLED
        SYSTEM DIAGNOSTICS               V6.5                    INSTALLED
        DIAGNOSTIC DATABASE              V2.7                    INSTALLED

********************************************************************************

Sun Aug 30 19:26:58 CDT 1970
Scan ring files initialization
        Checking for board changes ...
        Rebuilding cpu and io scan ring descriptions
scan_rp: Warning — No board present in slot mcc
        Rebuilding cpu and may board descriptions
        Rebuilding interactive scan file
ring asu 228 bits
ring atu 285 bits
ring ipu 388 bits
ring mcu 252 bits
ring pcu 548 bits
ring vcu 244 bits
ring vpu0 56 bits
ring vpu1 56 bits
ring pop 208 bits
Initialization completed
(spu)>
Next task: exploring what can be done from the SPU UNIX prompt.