
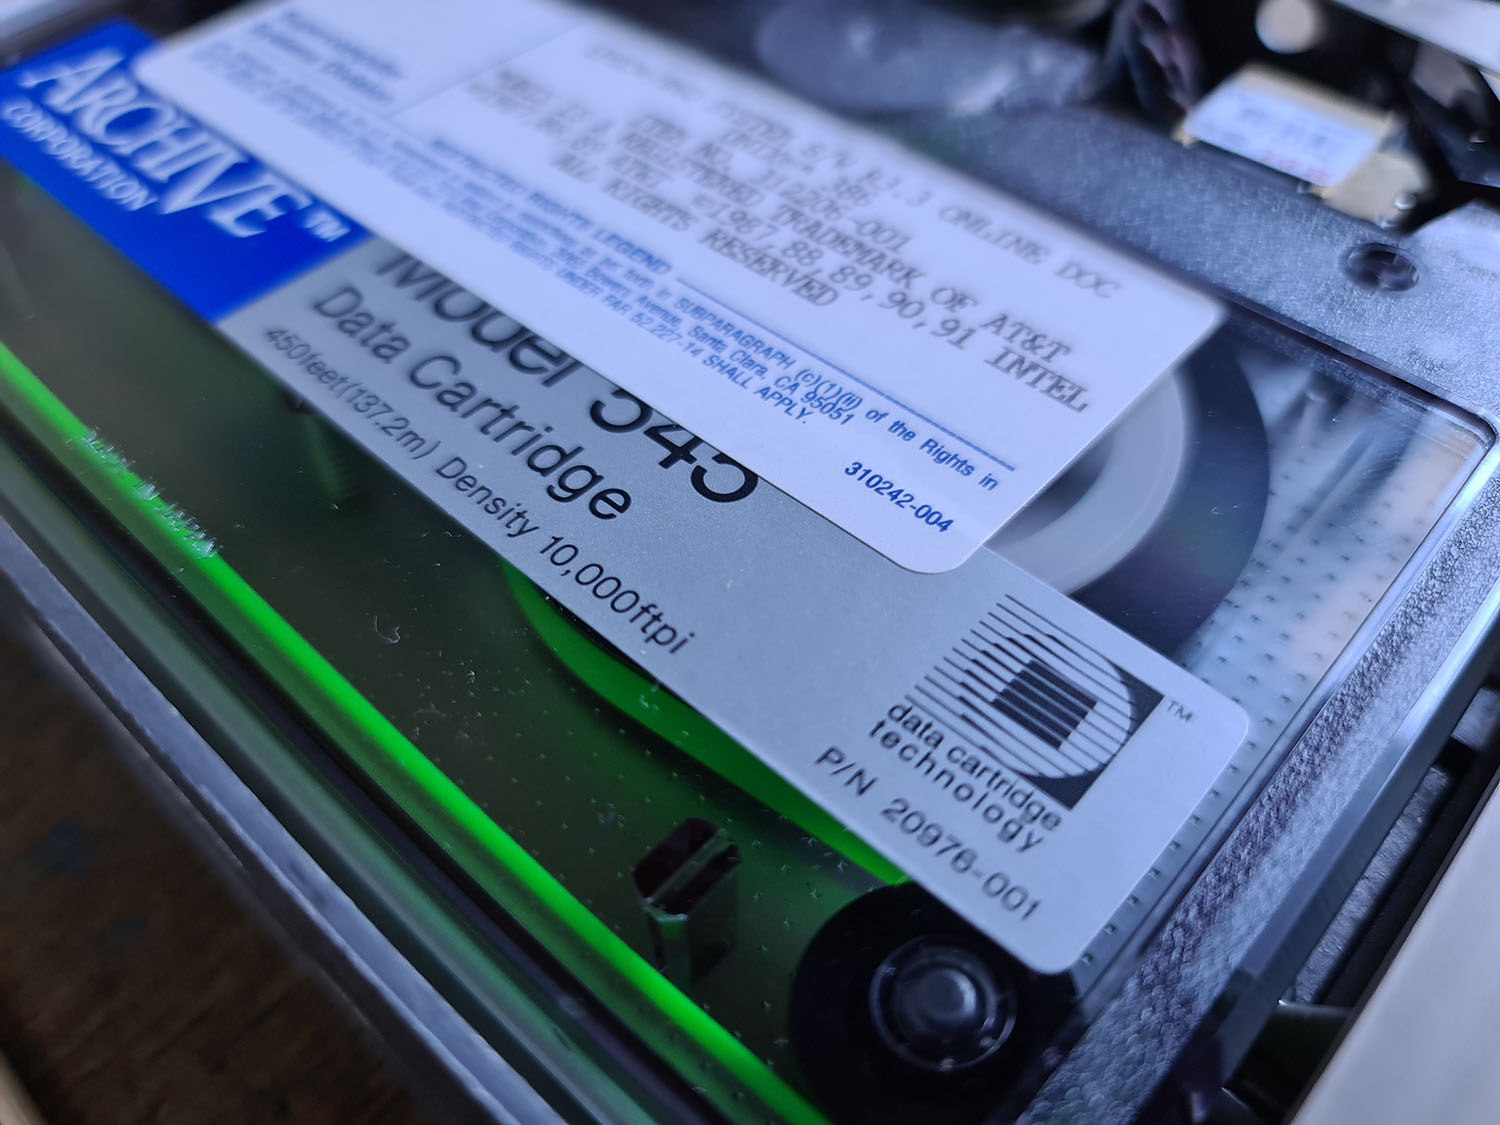
Much of the software we try to restore comes on QIC (quarter inch cartridge) tapes, particularly the older DC300, DC300XL, and DC600 tapes. Unfortunately, these media haven't held up very well over the years. This article describes the process we follow to recover as many of these installation tapes as we can.The QIC
cartridge format
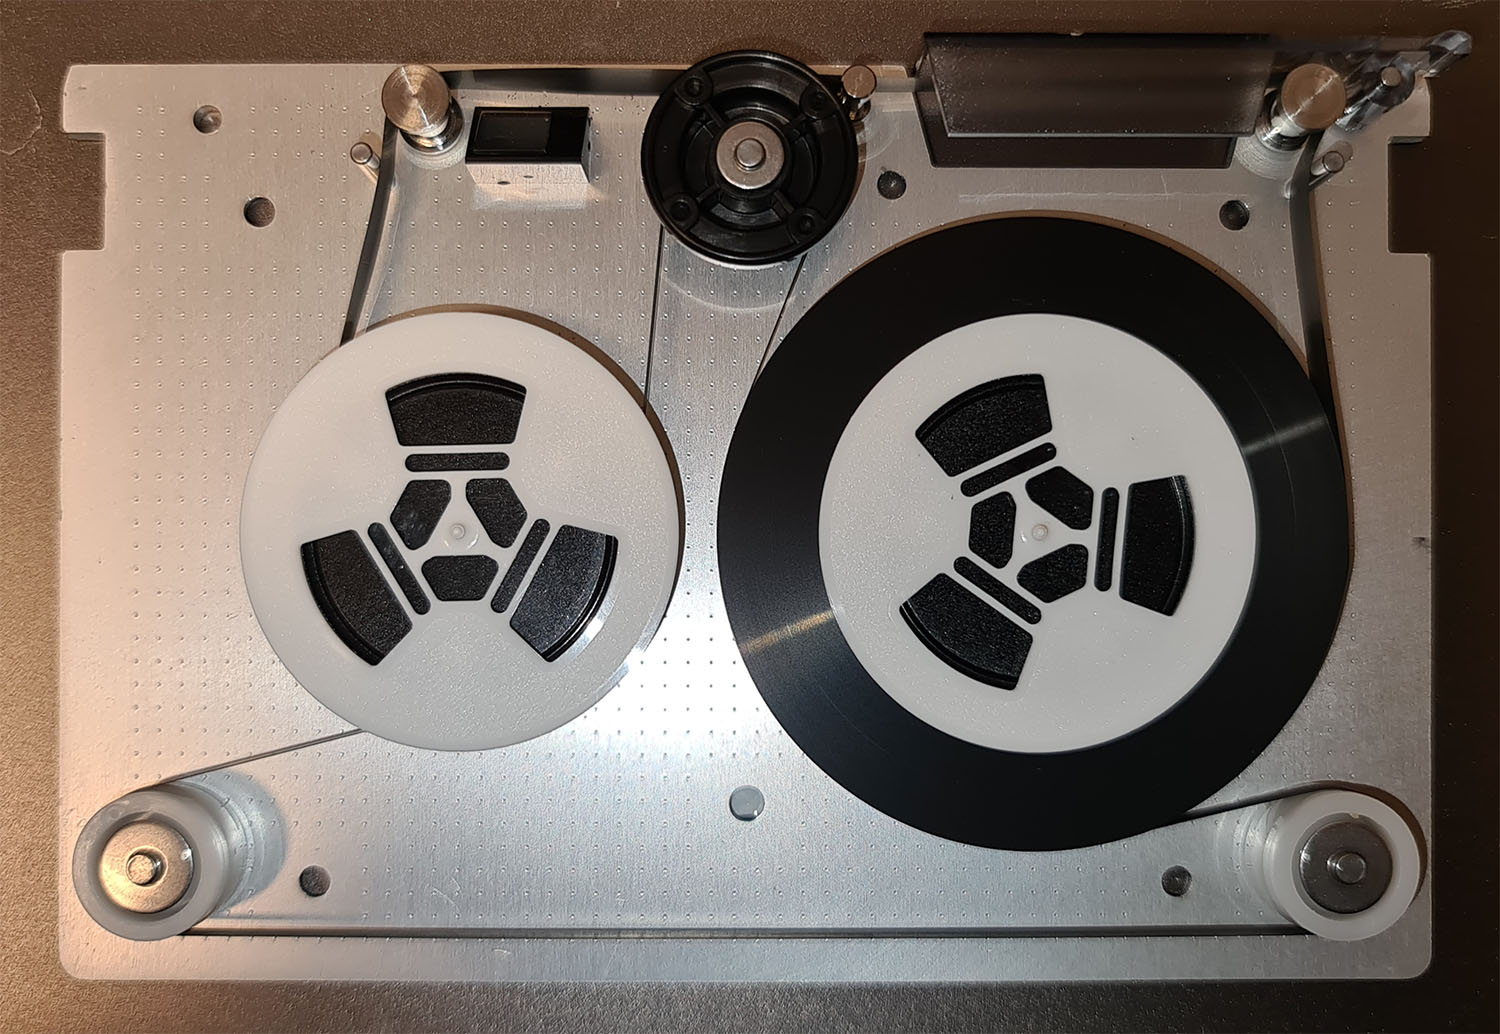
A QIC tape cartridge consists of a rigid metal base plate, covered by a plastic shell. The tape is stored on two spools inside, like a compact audio cassette, but unlike a compact audio cassette, the tape is not attached to the spools. Also, unlike most tape media, there is no capstan roller that directly contacts the tape. Instead, the capstan roller contacts a plastic wheel. That plastic wheel drives a polyurethane belt ("tension belt"), which in turn moves the tape on both spools.
Data is recorded on nine magnetic tracks on the tape (or more on newer, larger capacity QIC tapes), but unlike 1/2" reel-to-reel tapedrives, these nine tracks aren't read in parallel, but are read one at a time. The first track is read with the tape moving forward; at the end of the tape, the direction of the tape reverses, and the head moves up to track 2, which is then read with the tape moving backward, so the tape direction alternates between tracks.
Potential issues
The largest problems with these tapes are mechanical in nature, and stem from the material used for the magnetic tape, and that used for the tension belts.
The magnetic tape may have degraded over time. Particularly, it's the binder that degrades. The binder is the glue that keeps the magnetic particles stuck to the plastic tape. In really bad cases, the magnetic material just flakes off of the polyester base, but more often it's more subtle than that. More often than not, the tapes have developed a condition known as "sticky shed syndrome". In this case, the magnetic side of the tape becomes a bit sticky, and leaves a residue on the guiding posts (or "bollards") in the cartridge. The tape then gets stuck to these posts, usually when reversing direction.
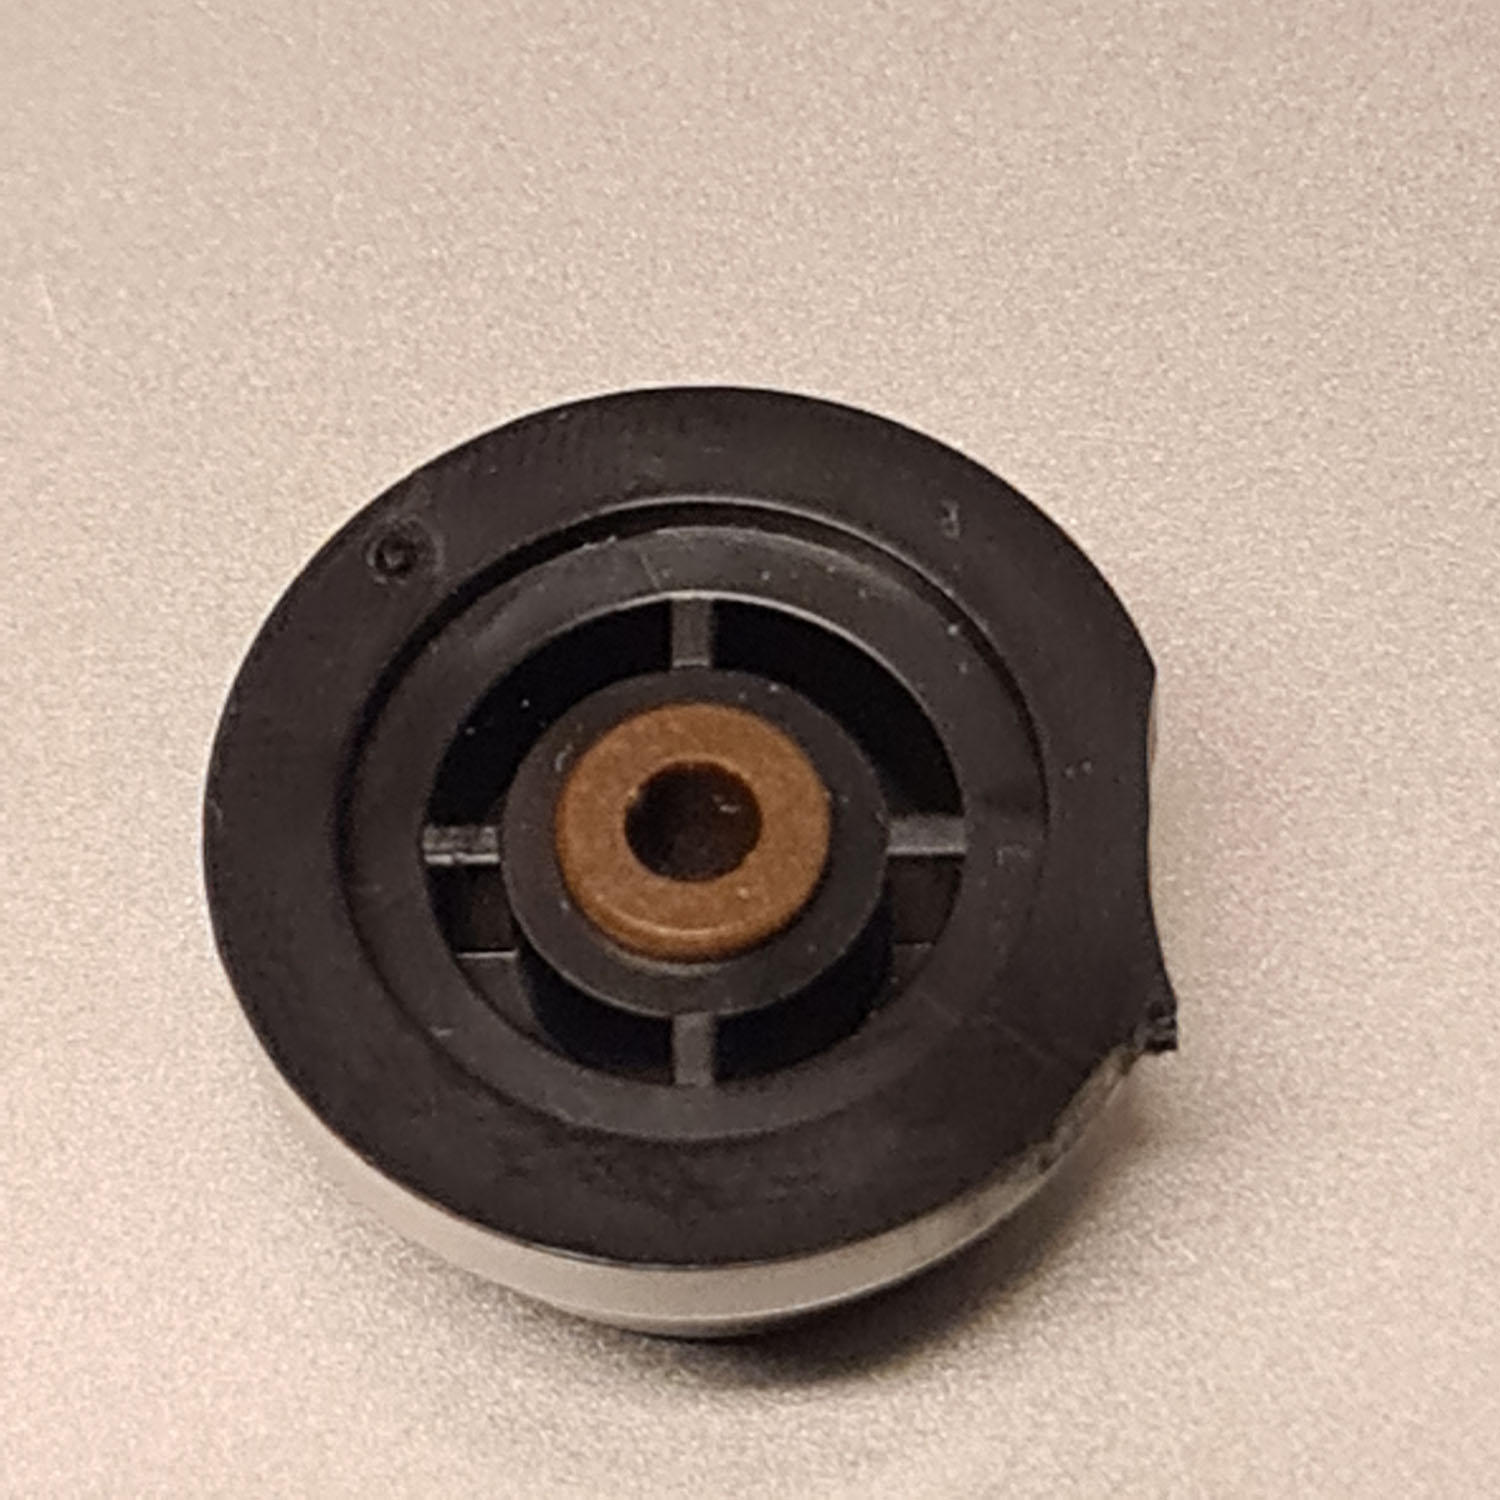
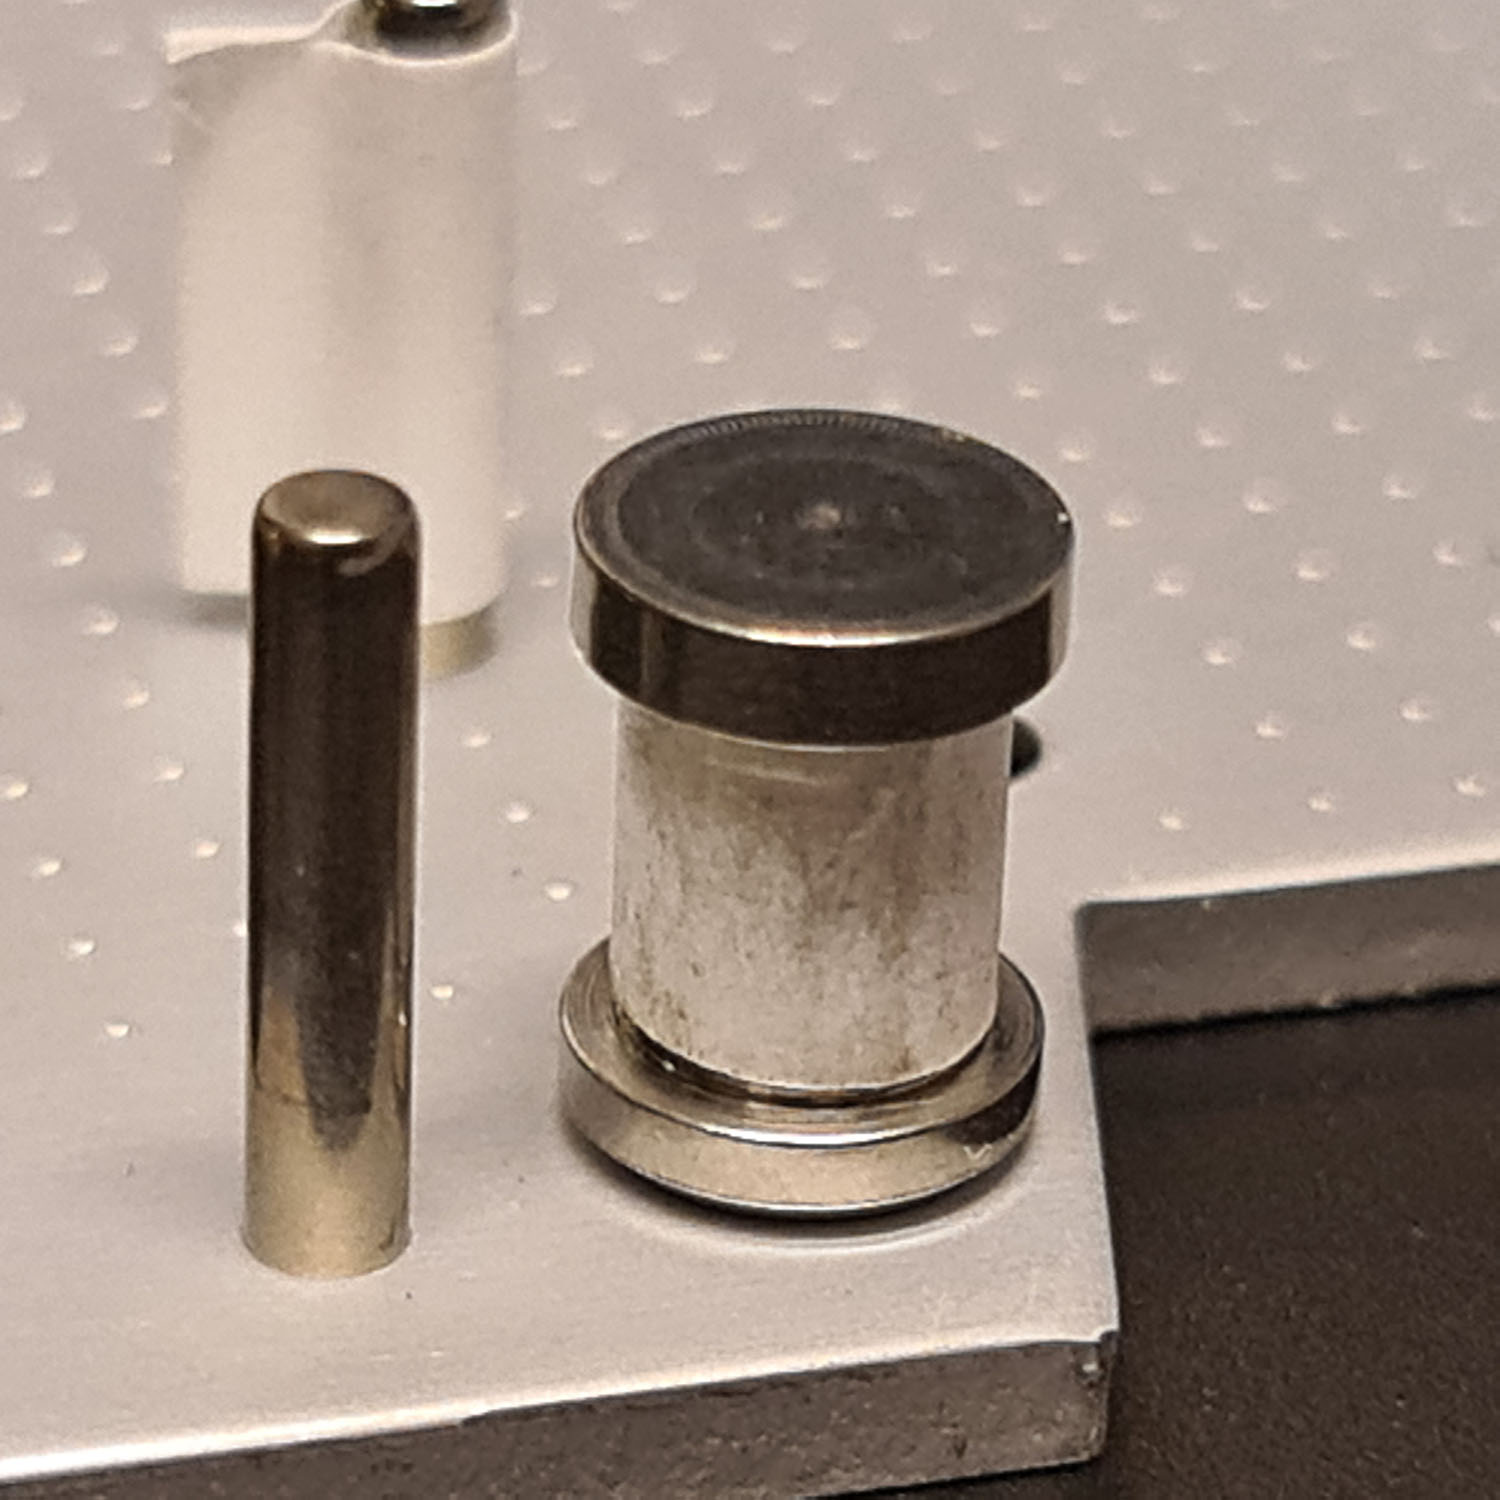
Extreme result of sticky shed syndrome: the tape became stuck, causing the capstan roller to grind down this plastic tension band wheel.
Another issue arises from the tension belts. Now that these tapes are 30 years old or so, these belts have either lost their tension, have broken into pieces, or are ready to break into pieces. They've also been in contact with the same area of the magnetic tape for a long time, and are probably sticking to the surface of the magnetic tape. There are some reports that boiling these old tension belts in water sometimes restores them temporarily, but we tend to just replace them. There are two known replacement options: belts from slightly newer tape cartridges (particularly 3M brand DC6150 cartridges seem to have belts that last a lot longer), or 6" Baumgartens Conserve Plastibands. Where we used DC6150 belts in the past, we now exclusively use these plastibands. You buy these in a pack of 100 pieces of assorted sizes. The back of the box says there are 20 of the 6" variety in there, but in reality there are only 5 of those in each box. One can read a lot of old tapes using a single plastiband, so one doesn't need many.
So, on to our process. Note that we didn't have to invent the wheel ourselves. Much of our process is based on discussions om CCtech; particularly between Al Kossow and Chuck G.
Step 0: do we need to make an image?
Step 0 for us is to determine if someone else has already made a tape image that we can use. Bitsavers has some tapeimages, and if they already have a copy of the tape, there's little reason for us to make another one.
Step 1: physical inspection
Step one is a thorough inspection of the cartridge: we look for signs of physical damage to either the cartridge or the tape itself. We look what portion of the tape is exposed: has the tape been rewound properly before being stored, or was it left somewhere in the middle of the tape? If the latter, recovering the tape contents may be more difficult. We also examine the condition of the belt.
Step 2: remove old tension belt and prepare for baking
Now, we open up the cartridge. Two screws need to be removed, and then the plastic shell snaps off if a little upward pressure is applied. The belt is carefully removed, to disturb the magnetic tape as little of possible. The belt is often stuck to the tape, and needs to be carefully peeled off. If there are any pieces of the belt left on the tape after that, we carefully remove these using tweezers. Next, we remove the three tension belt rollers.
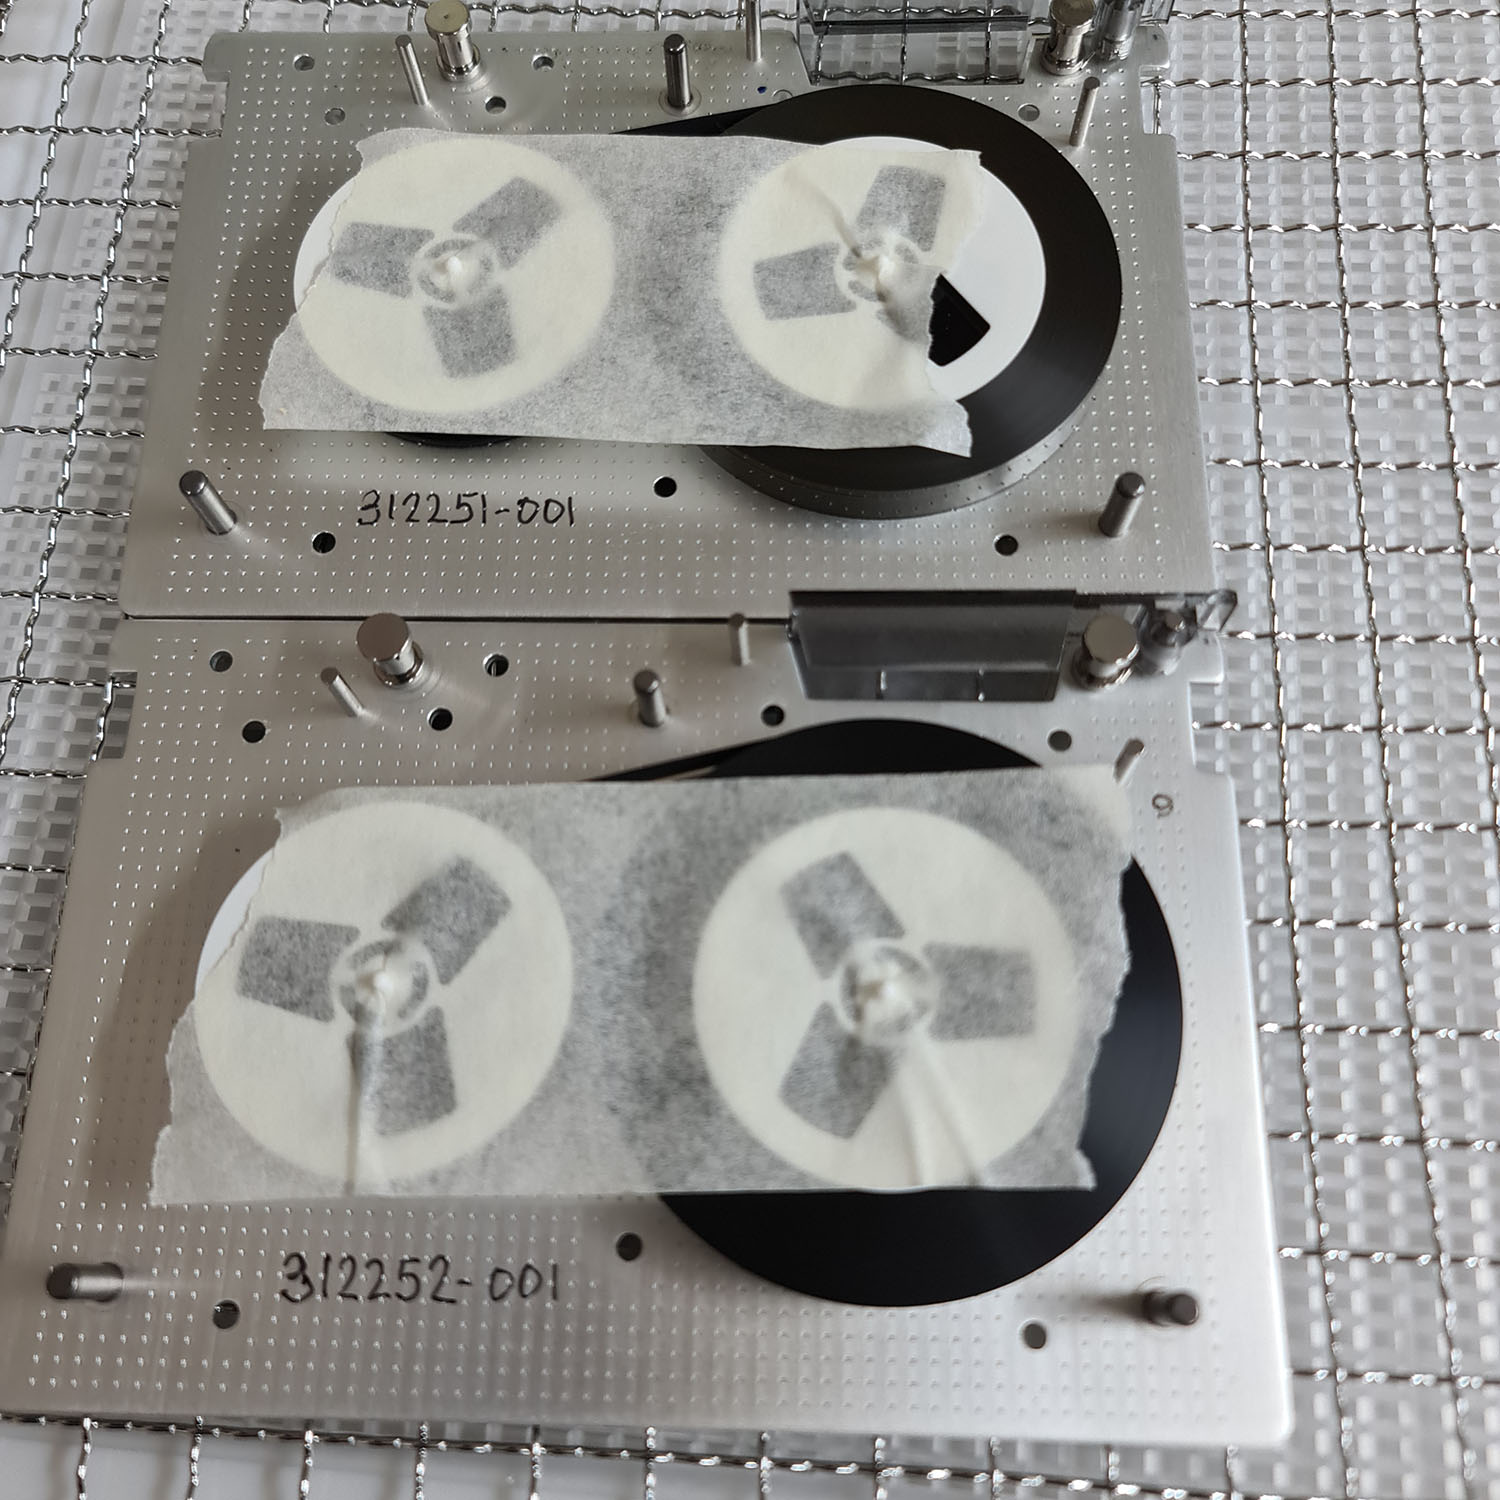
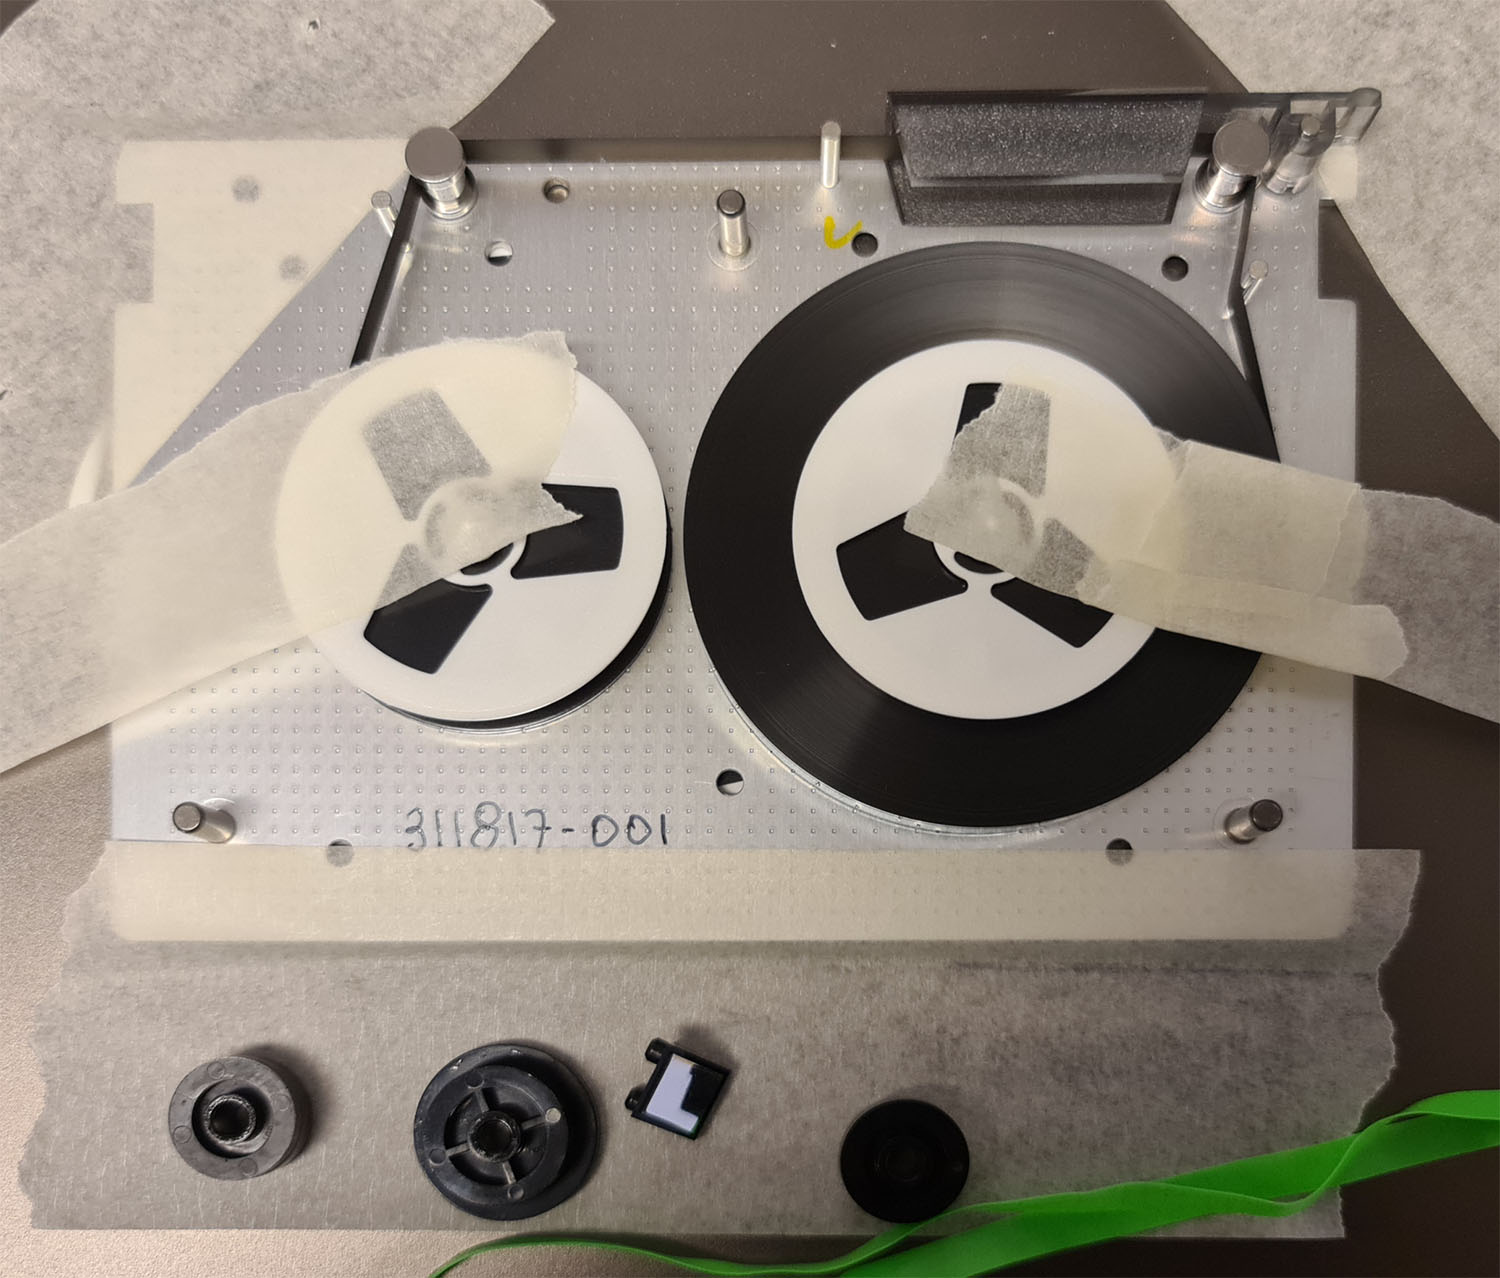
Finally, we lift the tape out of the tape path, so that the tape is no longer in contact with any of the metal pieces of the cartridge, and wind the excess length of tape onto the spools. We put a bit of painters tape over the top of the two spools to keep them in place. Using a permanent marker, we write some marks identifying the tape on the base plate.
Step 3: baking the tape
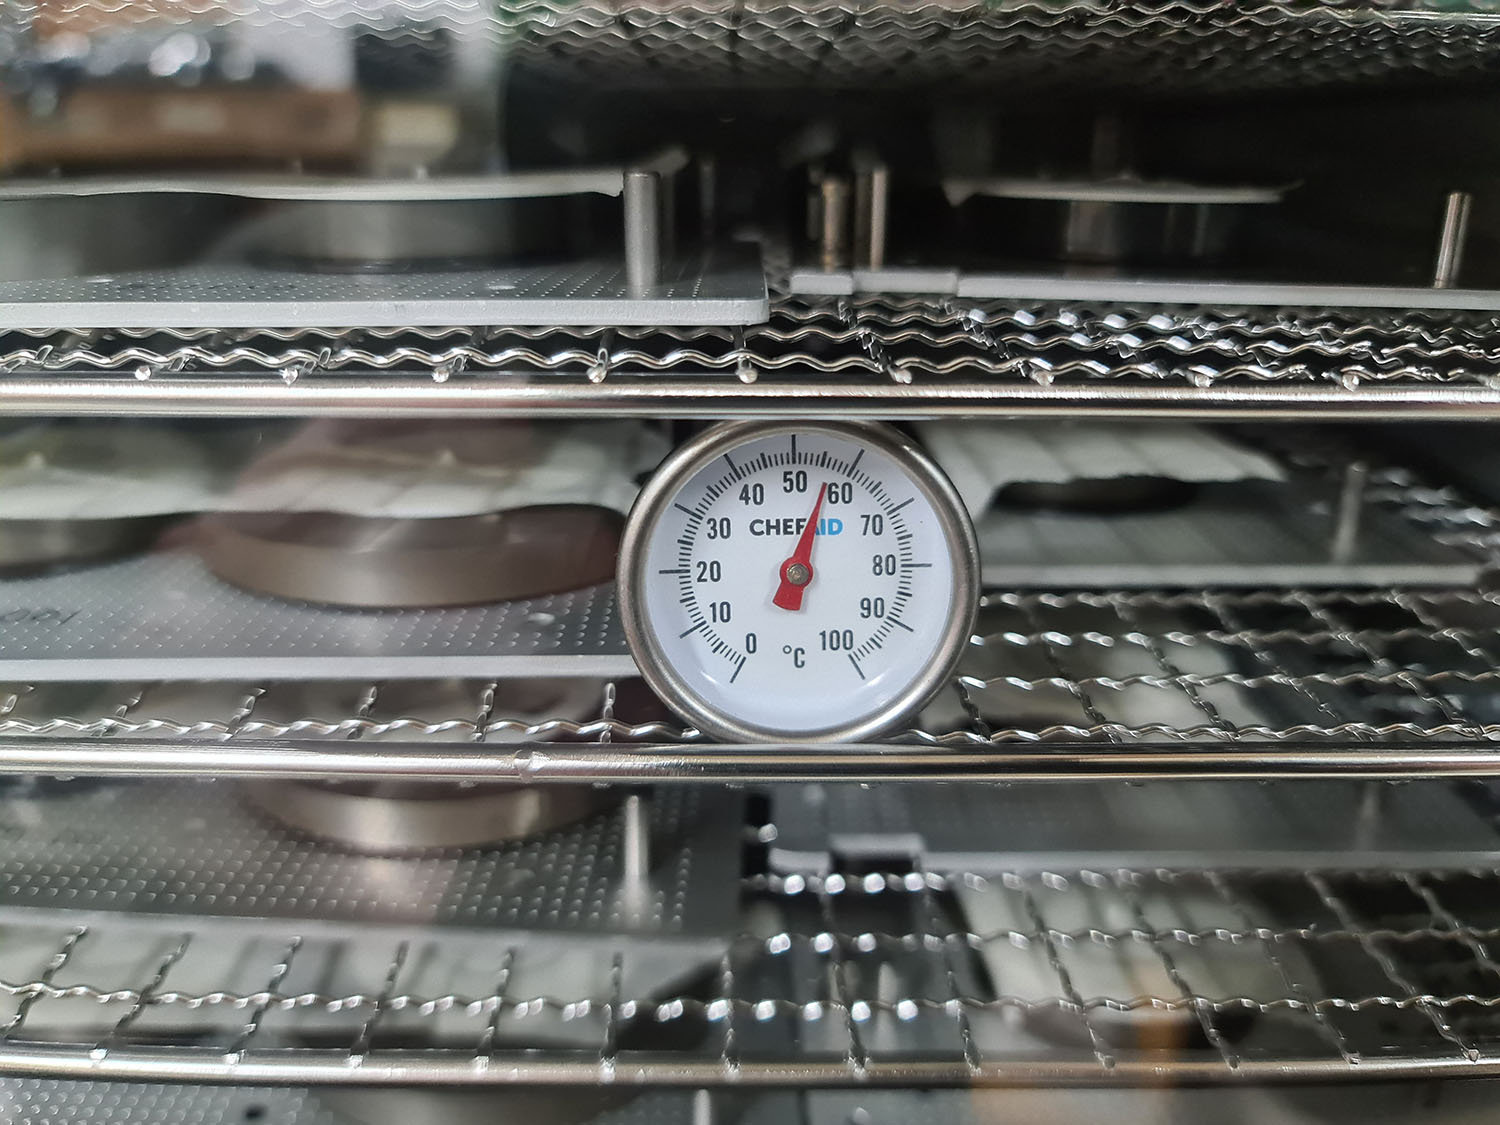
We then bake the tapes. This drives out moisture that the tape's binder has collected, and temporarily reduces the effects of the sticky shed syndrome. We use a food dehydrator with fairly precise temperature control to bake up to 30 tapes at a time. We bake at 58 degrees centigrade for 36 hours. The plastic cartridge shell doesn't go into the oven, just the base with the tape itself.
Step 4: transplanting the tape for reading
We don't use the original tape cartridges to read the tapes in, because even after baking the tapes, they often still shed a little on the metal tape guides. We have a few cartridges that we modified by putting self-adhesive Tyvek tape over any metal surface that comes in contact with the tape. This Tyvek does a wonderful job at not getting the tape stuck to the tape guides.
First, we fix the baseplate of our prepared cartridge onto our work surface with some painters tape. Then, we carefully lift the spools with the tape - and the painters tape used to keep them in place during the baking still in place - off the original cartridge base, and onto the prepared cartridge base. The painters tape keeping the reels together is then removed, and the tape threaded into its usual tape path. We then fix the reels to our work surface using some more painters tape, to keep them from unspooling as we install the plastiband.
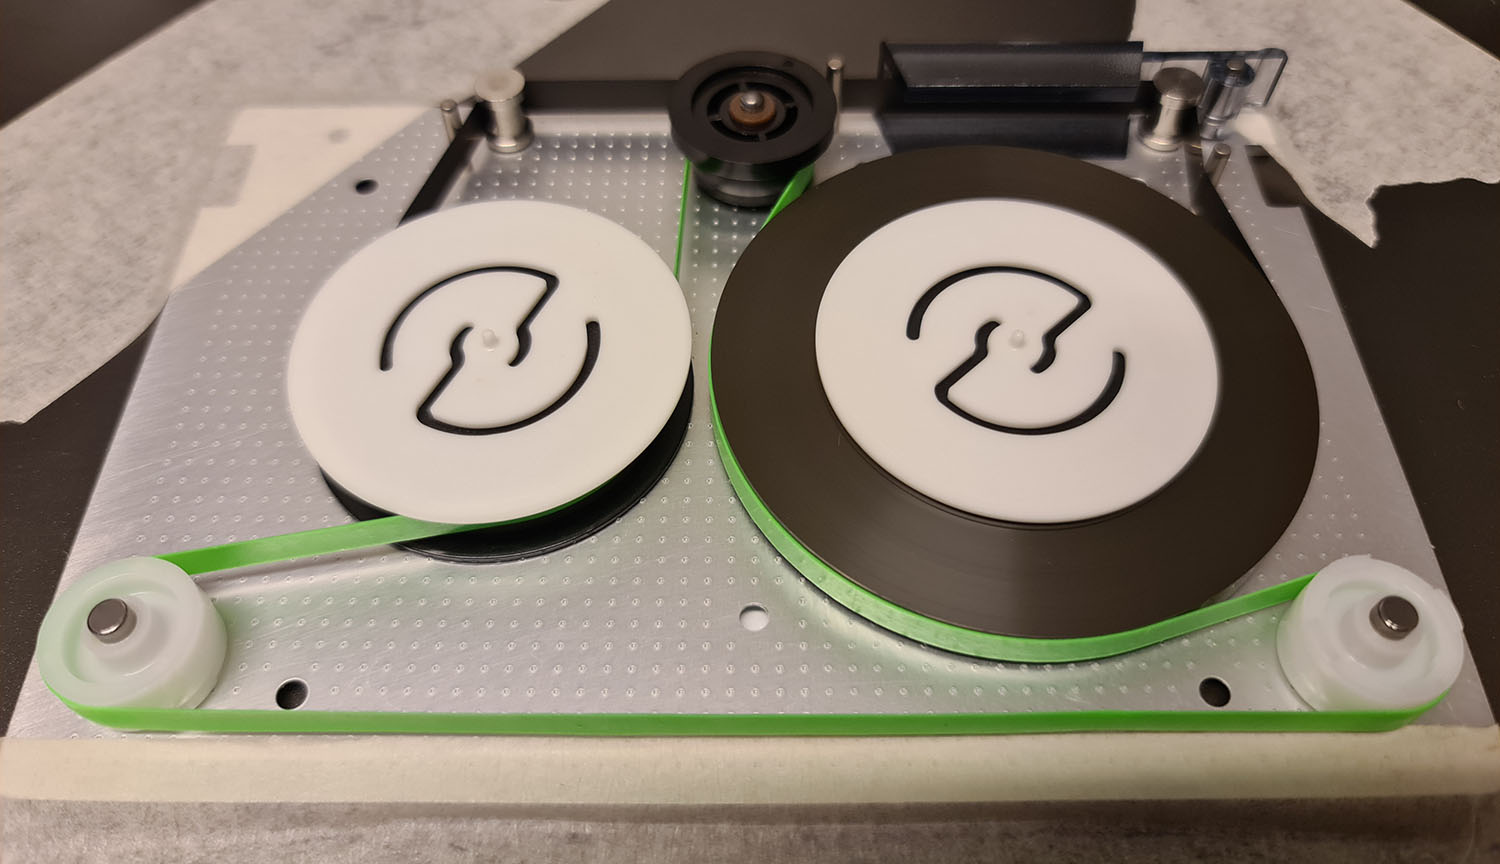
The plastiband is slipped over the plastic wheel that will be in contact with the capstan roller, which is then placed into position. Next, it is guided around the spool that's full of tape, and over the plastic wheel on that side. Finally, we put the last plastic wheel inside the band, and stretch it towards its position with two fingers of one hand, while using the other hand to keep the other wheels and reels from moving upwards, With a little luck, the third wheel drops onto its pin without the plastiband slipping under the reel or off one of the wheels.
Now, when you next remove the painters tape locking the reels into position, the tension in the plastiband will be redistributed, and the tape will move, unspooling a bit of tape. Using a thin bamboo chopstick, we hold the plastiband away from the tape on the spool that has very little tape on it, and turn that spool with our other hand to take up the slack. The tape needs a bit of tension, but not too much.
When that's done, We use the point of the chopstick to move the wheel that will be in contact with the capstan roller back and forth a bit, making sure that the motions are smooth, and re-adjust the tension as needed. We then make sure that the tape is within the leader area (after the double holes), so that the tape drive won't run the tape off the spool when it's trying to find the starting position, and snap the plastic cartridge shell into place.
Step 5: reading the tape
For reading, we now exclusively use Tandberg SCSI QIC drives. Unlike for instance Archive and Wangtek drives, the Tandberg drives don't use a belt to drive the capstan roller, but the capstan roller is directly attached to the motor. Also, the capstan rollers in Tandberg drives seem to have held up well, whereas the capstan rollers in Archive and Wangtek drives have often deteriorated into a semi-liquid goo.
The first thing to do, after inserting the tape, is to retension the tape (mt -f /dev/nst0 retension), This ensures that the tape is neatly wound into its beginning position.
We use the timage utility on Linux, after putting the tape-drive into variable block size mode, to create SimH .tap file images. With a little luck, our preparations allow the tape to be read successfully in one go. If not, we try three times before moving on to some more advanced techniques.
Finally, of course, we rewind the tape before ejecting it (mt -f /dev/nst0 rewind)
Step 6: archive the original tape
If the tape was read successfully - or if even using our more advanced techniques, we were unable to - we will take the tape off the cartridge we prepared for reading, and put it back inside its original cartridge. However, we do not thread the tape into its normal tape path, and we do not install any kind of tension belt. Instead, we wind the tape onto the reels, and keep the reels in place using some painters tape. We feel that this likely offers the best chance of being able to still read the tape in the future if that proves necessary.
Step 7: verify tape contents and publish
If we managed to read the tape, we need to make sure that it actually contains what we think it contains. Sometimes, we find that people have re-purposed old installation tapes, and overwritten them with a backup of their data. If everything checks out, and if we believe the tape contents may be of value to others, we'll place the tape images in our downloads section.
Some more advanced techniques: mechanical
Sometimes, there are additional mechanical issues that the previous steps don't cover.
We've have tapes that were broken in two pieces. In this case we use scotch magic tape to glue the pieces back together. This works well is the break is before the actual tape leader, but results vary if the tape is broken in the middle of data. In that case it's almost unavoidable to lose at least one 512 byte block of data on each track.
The way we do this, is to put a short bit of magic tape on out work surface, sticky side up. We keep it in place using two other pieces of magic tape, overlapping just a little bit of the top and bottom of the first bit of magic tape. Then, using tweezers, we carefully place the two ends of the broken tape onto the exposed magic tape, making sure to align them to each other as well as we can, as well as to keep them straight. We then place a final piece of magic tape, equal in length to the first one, over the broken tape. Using a ruler, we carefully cut the magic tape to the width of the magnetic tape.
Another possibility is that a bit of magnetic material has been completely pulled off the magnetic base. This confuses the optical end-of-tape sensors, and can cause the tape to run off one of the spools, or refuse to load. In this case, we use the magic tape technique described above to glue a bit of good tape from a donor tape over the transparent part of the tape. Data loss is unavoidable if this happens in the data area of the tape.
Some more advanced techniques: software
Sometimes, we encounter read errors that none of the techniques described so far can overcome. However, sometimes, not all is lost in this case. We'll describe two cases here that we encountered while making images of the Intel iPSC/860 installation tapes.
Key to these techniques is to perform partial reads. After timage quits with a tape error, try starting it again (without rewinding the tape) a few times, until it starts reading data again (read to a different file of course). If it throws another error later, repeat again. You may end up with a dozen partial reads, and data between these reads will be missing.
You can do this a few times (rewinding, retensioning in between tries), to get multiple sets of partial reads (or, surprisingly, sometimes all of a sudden you get a perfect read). If the tape doesn't always error out in the same places, you have more data with these additional trials.
Sometimes, two or three reads with bits missing are enough to give you all the data off the tape, and all that's left to do is to puzzle the pieces together.
Case 1: Two identical tapes
We had two copies of the iPSC/860 System Software R3.3.1 Extension tape. Neither of those gave us a complete read, but the errors were in different places. Combining the data we could read from the two tapes, we could reconstitute the entire contents of the tape.
Case 2: Knowledge of what's supposed to be there
We only had a single copy of the Intel System V R3.2 V2.1 installation tape. There were several spots on the tape that were completely unreadable. Fortunately, we also had a hard disk, containing a corrupted installation of this OS. So, using an image of this disk, we wrote a simple utility to extract all the files from the / and /usr filesystems on the disk.
The data on the installation tape consists of cpio archives (with ASCII headers), making it easy to recognize what files are on the tape. Inside each of these archives is also a file (called "Files" that lists all of the files in the archive, which is used to verify that the installation was successful. We were able to determine what files were in the areas of the tape that we could not read, and using a hex editor, we could insert cpio file headers for these files, and the files themselves that we extracted from the disk image, to completely reconstitute the installation tape. Eventually, we were able to use this tape image to perform a clean installation of the OS.